KEY POINTS
- The right greenhouse layout makes it easier for plants to get water, light, and air flow.
- Consider a southern placement or a location that gets ample sunlight for the best results.
- Linear, zonal, and multi-bed layouts are some of the most popular greenhouse options.
- A few common greenhouse design flaws to avoid are overcrowding, narrow aisles, and poor drainage.
Designing a great greenhouse layout makes all the difference in your gardening success. The right (or wrong) layout is a key factor in whether or not you have a happy, thriving garden or one that’s seen better days. Layouts are about more than plant placement; they have everything to do with air flow, how light reaches your crops, and how easy it is for you to water, prune, and harvest.
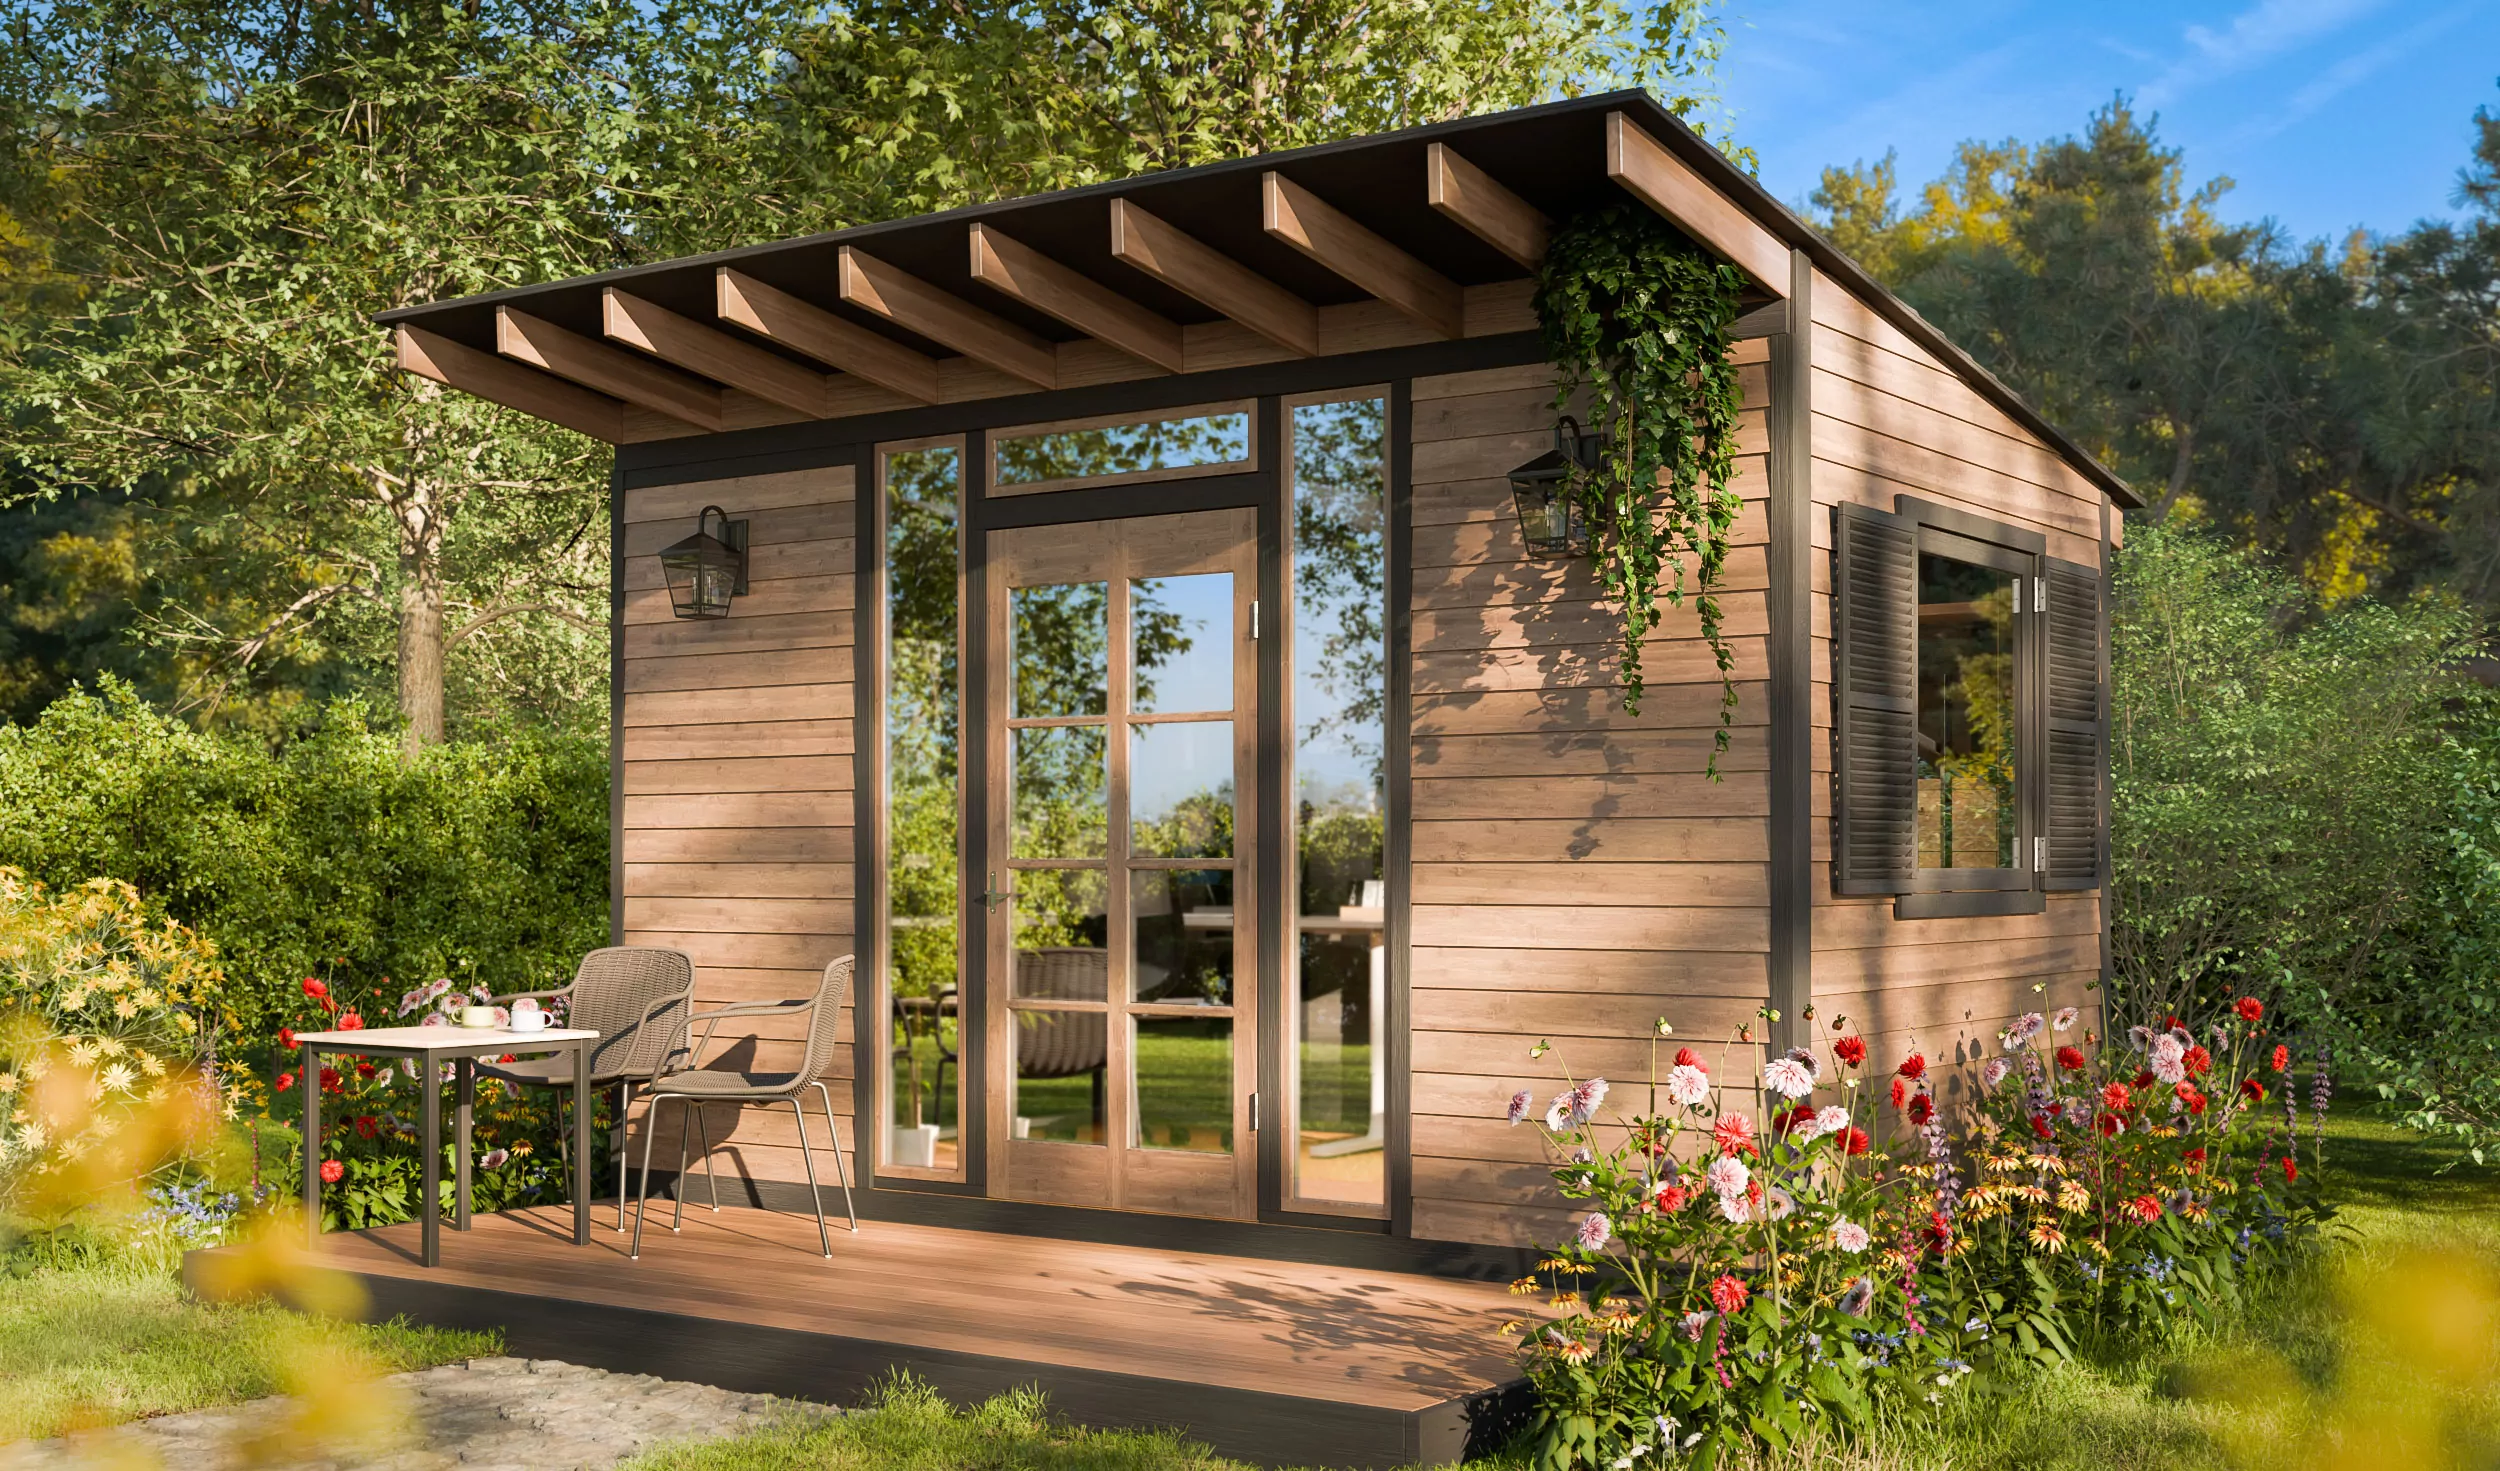
Whether you’re fully creating your own DIY greenhouse or working with a preexisting structure, the right setup can support healthy crops and simplify your daily tasks, turning your greenhouse into a place you enjoy spending time with efforts that pay off.
Studies from the University of Massachusetts Extension show that a smart layout can increase your usable growing space by up to 60% and cut daily maintenance time by half. It’s a winning gardening strategy all around. If you’re ready to dig in, read on for advice on how to plan a greenhouse layout and learn several of the best greenhouse layout options.
How to Plan Your Greenhouse Layout
Designing a greenhouse starts long before you add plants or shelves. An effective layout begins with clear goals, a well-chosen location, and the right structure for your space. Here are the best steps for planning a greenhouse layout in your own garden.
1. Set Your Goals
Start by sitting down and defining your gardening goals. This will help you determine the kind of layout you’ll need and the necessary features, as it’ll differ depending on what you’re growing. A few questions to consider: Are you growing vegetables? Starting ornamentals from seed? Are you planning to use the space year-round or seasonally? What growing conditions do your plants need?
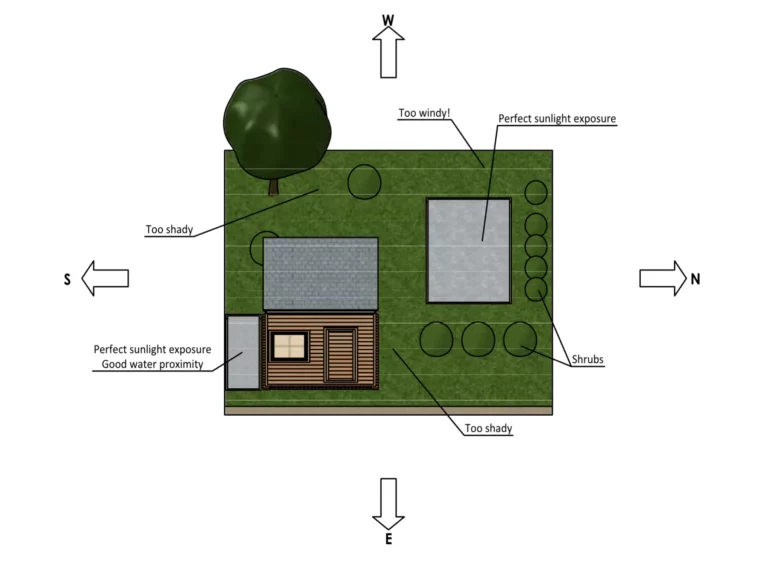
2. Choose the Right Spot
One of the most important needs plants have is light, though the levels they require will vary. In most regions, placing your greenhouse in the south will give it the best year-round exposure to sunlight. This is especially important during winter when light levels drop.
Take a look at what plants you’re planning to cultivate and note their light requirements. For example, leafy greens and herbs typically require 12 to 14 hours of light per day to grow well. You’ll also want to think about these factors when selecting a site:
- Light exposure: The position should give your plants enough hours of direct sunlight each day.
- Shelter from wind: Fences or shrubs can provide windbreaks without blocking light. Wind can cool the greenhouse rapidly and even stress the structure over time. Studies recommend reducing wind speeds below 20 mph to minimize these problems.
- Water access: Being close to an outdoor tap or rain barrel saves time and effort.
- Drainage: Good drainage is vital. Choose a spot that’ll stay dry after heavy rain and a place that has well-draining soil to prevent flooding or root rot.
Pro tip: Even though providing enough light is crucial for plant growth, the summer sun can become too intense. In those cases, shade cloths are a practical solution. They help filter direct sunlight, reduce overheating, and prevent plant stress during heat waves.
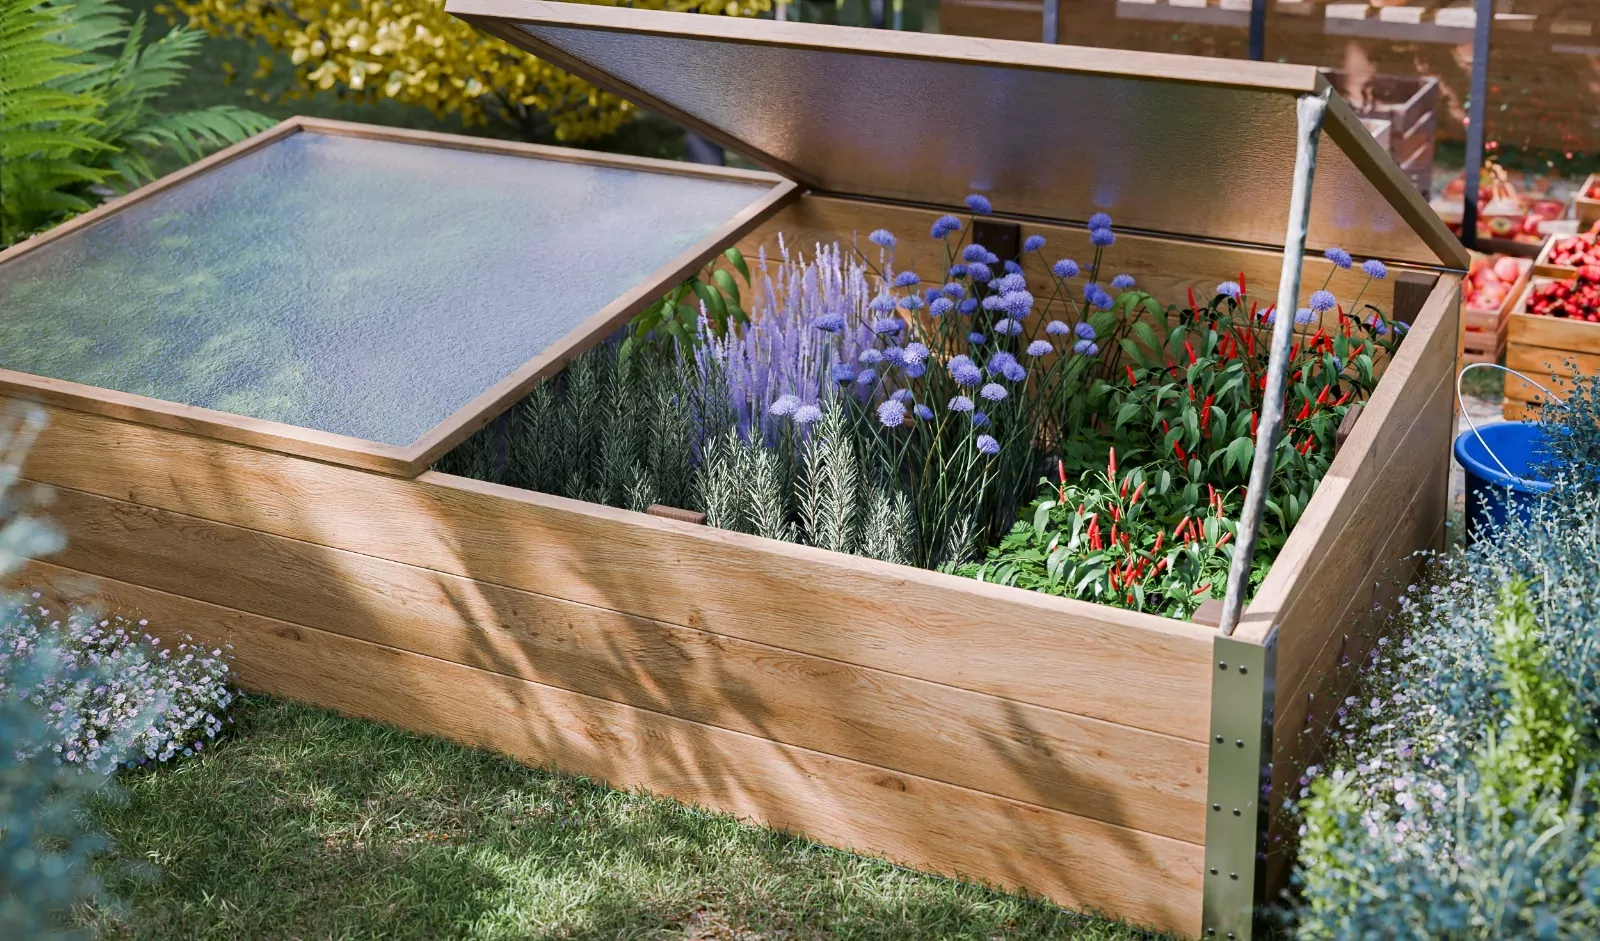
3. Pick the Ideal Size for Your Needs
Once you’ve chosen the location, think about how you’ll use the space before deciding on the size. A small greenhouse is perfect for seed-starting, propagating cuttings, or overwintering a few delicate plants.
If you’re planning to grow vegetables year-round or want a space to pot, store tools, or even relax, you’ll need more room to move. The University of Georgia Extension recommends building your greenhouse 25% to 50% larger than your initial needs. This gives you enough room to add more plants in the future.
Here are a few common size ranges based on purpose:
- 6×8 feet: Ideal for seed starting or compact gardens.
- 8×12 feet to 10×16 feet: Good for small-scale food production and workspace.
- 12×16 feet or more: Best for combined use, growing, potting, and relaxation.
4. Decide Between Freestanding or Attached
You’ll also need to choose between a freestanding or attached greenhouse. Here’s a quick look at the pros and cons of each to help you pick the right configuration.
| Type | Best For | Advantages | Considerations |
| Freestanding | Larger yards and open spaces | Sunlight from all directions, customizable layout | Higher initial cost, more exposed to various weather conditions, costs more to heat |
| Attached | Small or urban spaces | Efficient heating, easy utility access | Limited light on one side, fixed positioning, usually smaller in size |
Greenhouse Floor Plans and Layouts
A smart layout should always do three things: make daily tasks easier, give your plants room to thrive, and create a space you enjoy using. Below are some of the most common and effective greenhouse layout ideas.
Linear Layout
Best for: Simplicity and efficient gardening
The linear layout is one of the most popular choices, especially for small or narrow greenhouses. This floor plan involves placing long growing beds or tables along both sides of a central aisle. It keeps everything accessible and neatly organized.

Zonal Layout
Best for: Grouping plants by their growing needs and creating multipurpose areas
If you’re hoping to care for plants, pot new ones, and spend time relaxing in your greenhouse, a zonal layout gives you the best configuration for this. It divides the space into functional areas, which you can designate for specific activities or plant types.

U-Shape or L-Shape Layouts
Best for: Easy access around your greenhouse
These classic layouts work well for walk-in greenhouses where you need central access and plenty of space. To create a U-shape layout, you’ll place growing beds or tables line three sides of the greenhouse, with a clear path in the middle. This put everything within reach and allows you to make the most of your space. The L-shape layout is similar but serves as a better option for greenhouses placed against a wall or in corners.

Multi-Bed Layout
Best for: Year-round planting
If you want to grow in all seasons, a multi-bed layout gives you the opportunity to rotate plants seasonally, as well as a dedicated space for specific tasks. It also creates an area that allow you to do so without disturbing the rest of your setup. For example, one bed can host cool-season crops in early spring, another warm-season vegetables in summer, and a third fall greens or overwintering herbs.
Pro tip: Use small garden markers or color-coded tags in your beds. This makes it easier to remember where specific crops are planted and keeps seasonal rotations organized.

Greenhouse Organization Tips
Here are a few ideas for keeping your greenhouse organized and perfectly laid out for all your gardening endeavours.
- Divide the space into clear areas. Having separate zones for growing, potting, and storing supplies helps you stay organized and protects the plants by keeping clutter to a minimum.
- Optimize the grow zone for sun and airflow. Keep this in mind when you’re planning your layout and try to keep plants that need the most light in areas of the greenhouse that get it.
- Put potting benches near the entrance. This gives you easy access to tools and supplies right when you walk in.
- Use vertical space. Hanging pots, stacking crates, or trellises can double your growing area without blocking necessary light.
- Group by plant needs for ease. Separate your plants and group them together by need so you can better care for each section.
- Create wide walkways. Aim for 24 to 36 inches of width so you have no problems with carrying trays, kneeling to plan, or rolling carts. If you plan to use raised beds or large benches, make sure you can reach both sides.

Greenhouse Layout Checklist
Use this handy checklist to help you visualize how to organize your greenhouse interior.
| Feature | Recommendation |
| Potting Bench | Place near the entrance but away from direct sun to protect tools and soil |
| Shelving | Install on north/south walls for even light; use adjustable brackets |
| Hanging Baskets | Use ceiling beams or upper wall hooks for cascading plants and herbs |
| Walkways | Maintain 24-36″ of space; avoid placing large pots near path edges |
| Tiered Benches | Organize by height; keep tallest plants toward the center or back wall |
| Tool Storage | Mount vertical racks or pegboards to keep tools off the floor and within reach |
| Fertilizer and Soil | Store fertilizers and soil amendments in sealed bins in a shaded, well-ventilated storage area to prevent moisture damage and reduce the buildup of potentially harmful fumes |
| Water Access | Keep a hose or watering can near the potting bench or central path for efficiency |
Small Greenhouse Layout Ideas
While small greenhouses may have a more compact footprint, they still offer plenty of benefits and the perfect area for growing plants year-round. The best small greenhouse interior layouts make the most of vertical space and clever zoning. These are some of the best layouts for working with these pint-sized plant houses.
Use Vertical Features
Think upwards. Install shelves, trellises, and hanging planters, which give you back valuable floor space. Lightweight plastic or wire shelving works well for small pots and seed trays, while corner-mounted racks can hold tools, gloves, or plant tags. Movable or foldable benches are also incredibly useful in tight spaces. Instead of permanent tables that block airflow and take up room, choose fold-down models that can be tucked away.

Create Micro Zones
A zonal layout is possible in a small greenhouse; you just have to scale it down to size. For better organization, try dividing the space into micro-zones. This could include a narrow path down the center or along one edge, one vertical zone with tiered or wall-mounted shelving, a “utility wall” with hanging racks, and a seed-starting corner with a heat mat or insulated mini-propagator.

Build an Adaptable Layout
This is ideal for considering a seasonal workflow, especially if you’re planning to rotate crops or plant year-round. Your space may be filled with seed trays and propagation domes in early spring. By mid-summer, you’ll want access to trellises and better airflow. Design your layout to adapt, not just to fit.
Pro tip: Use hanging shoe organizers to store seed packets, gloves, small tools, or even tiny herb pots. They’re space-saving and surprisingly durable!

Common Layout Mistakes to Avoid
These mistakes can negatively impact your plants and make it more frustrating for you to use your greenhouse day to day. Here are the design errors to avoid and how to troubleshoot them if they happen.
1. Overcrowding
This is a classic first-time error. Filling every inch of your greenhouse with plants may feel productive, but it actually restricts airflow, makes it hard to move around, and increases the risk of diseases and pests.
Fix it: Leave at least 6–12 inches between plants and always consider airflow and space, so you can get around easily, too.
2. Ignoring Vertical Space
It’s easy to simply look at the floor space in your greenhouse as your only usable area. However, vertical space gives you even more room to grow plants. Not using it can result in crowding, clutter, and overfilling your greenhouse.
Fix it: Add shelves, trellises, and hanging planters to multiply your space (and yield).
3. Making Narrow Walkways
Tight pathways in your greenhouse (usually under 24 inches) can make it hard to move freely, especially with tools or carts. The narrower they are, the bigger impact they can have on airflow. It can also increase the chances of you accidentally stepping on or brushing plants and damaging them.
Fix it: Leave at least 24–36 inches between beds or benches to allow room for carts, tools, and easy plant access.

4. Poor Drainage
Standing water under benches or in trays is a common but often overlooked problem. It leads to root rot and mildew growth, and attracts pests like fungus gnats.
Fix it: To prevent water accumulation, install slatted or raised benches that drain easily. Opt for permeable flooring, including gravel, crushed stone, or permeable pavers, which have better natural drainage.
5. Lack of Planning for Climate Control
Lastly, many gardeners forget to plan for climate control. Heaters, fans, grow lights, and shade cloths need proper placement. Adding them later often leads to tangled cords or blocked access.
Fix it: Consider these features and make space for them from the beginning.
Free Greenhouse Layout Plans & Resources
Starting with a clear layout can make the process smoother if you plan to build your greenhouse. We’ve prepared a set of free greenhouse plans that you can download and use as a foundation for your project.
You can also try interactive tools like GrowVeg, which lets you drag and drop greenhouse features into a digital layout. These planners are great for testing different configurations, organizing crops by season, and adjusting plant placement as your needs change.
Some university extension programs also offer downloadable greenhouse blueprints and design guides, perfect for more technical builds or larger structures.
Bookmark this page so you can return to these resources throughout your planning process! And if you’re looking for more inspiration, check out our greenhouse ideas for every budget to help you get the most out of your gardening space.
Summary—Planning a Great Greenhouse Layout
A well-planned layout and the right greenhouse structure make all the difference. By avoiding common pitfalls and using visual tools or templates, you’ll create a space that’s not only productive but enjoyable to work in.
Don’t forget to explore the free plans, illustrations, and resources this guide shares. They’re here to help you design a greenhouse that works beautifully for your space and goals!