Factors to Consider When Choosing a Pergola Plan
Before diving into specific designs, it’s essential to consider several key factors that will influence your choice:
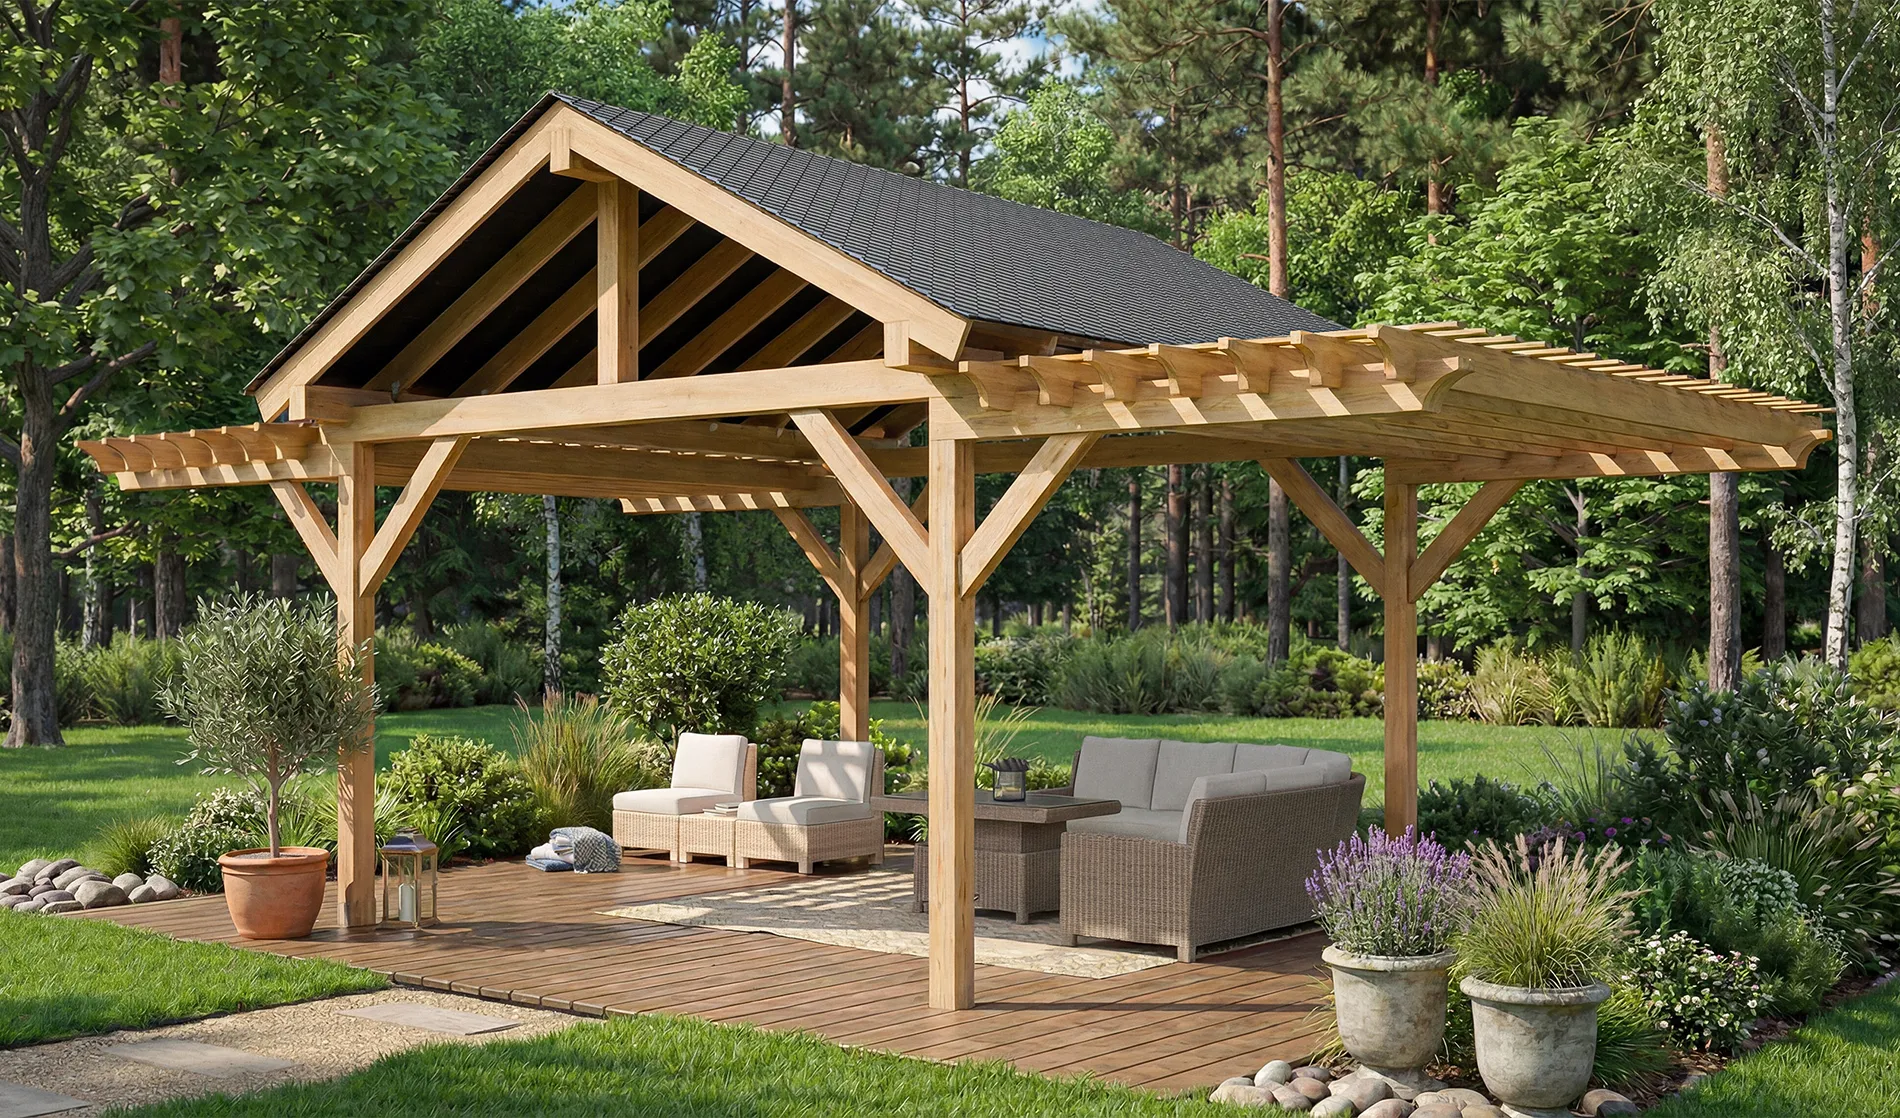
- Climate: Your local climate plays a significant role in determining the best materials and design for your pergola. In areas with heavy rainfall or snowfall, a pergola with a solid or partially covered roof may be desirable. For attached designs in these regions, builders must verify that the shed roof pitch allows for adequate drainage to prevent water pooling at the ledger board; a single slope effectively directs runoff away from the home’s foundation. For regions with intense sun, consider incorporating shade options like adjustable louvers or climbing plants. In high-wind regions, builders must account for wind lift on open roofs, as the canopy can act like a wing, requiring deep concrete anchors to prevent uplift. Consider wood tones that complement the surrounding environment.
- Budget: Pergola plans range from simple and affordable to complex and expensive. Determine your budget upfront and select a plan that aligns with your financial constraints. Remember to factor in the cost of lumber (cedar, redwood, or pressure-treated), fasteners, tools, and any additional features like privacy screens or lighting.
- Skill Level: Be realistic about your woodworking skills. Beginner-friendly plans feature straightforward joinery and readily available materials. If you’re an experienced builder, you may be comfortable tackling more complex designs with intricate cuts and custom features.
- Location and Intended Use: Where will your pergola be located? Will it be attached to your house, freestanding in the garden, or positioned on a patio? How will you use it? For dining, lounging, or entertaining? The answers to these questions will guide your choice of size, shape, and style. Design features like a cantilevered roof can maximize shade coverage while optimizing the roof overhang vs. post footprint ratio, allowing for more usable ground space without obstructing pathways. Cantilevered designs extend the roof past the support posts, balancing the hanging load with strong joinery to eliminate corner posts that might block views or traffic flow. Consider an oblique view of the intended location to visualize the final structure.
- Style: Do you prefer a modern, traditional, rustic, or contemporary aesthetic? Choose a pergola plan that complements your home’s architecture and your personal style. Modern designs often feature clean lines and minimalist details, while traditional styles incorporate classic columns and decorative elements.
- Permits and Regulations: Check with your local building department to determine if a permit is required for your pergola project. Be aware of any zoning regulations or HOA restrictions that may affect the size, height, or placement of your structure.
DIY vs. Professional Installation: Building your own pergola can be a rewarding and cost-effective project. However, it requires time, effort, and a certain level of skill. If you’re not comfortable with woodworking or lack the necessary tools, consider hiring a professional contractor. While this will increase the overall cost, it can ensure a structurally sound and aesthetically pleasing result. A beam plan can be helpful even for professional installers.
Our DIY pergola plans require only basic woodworking skills to create beautiful structures. Each download includes detailed supply lists and step-by-step building plans for popular designs, from 12×12 pergola and attached pergola plans to pergola plans with roof and free standing options. Whether you want wood pergola plans for classic builds, cedar pergola plans for durability, timber frame pergola plans for strength, or modern pergola design plans with lattice panels, we have it all.
Choosing the Right Pergola Plan
The best pergola plan for you will depend on your specific needs and aesthetic preferences. Pergolas can serve a variety of purposes, including establishing an elegant transition between your home and garden, demarcating specific outdoor living areas, providing filtered shade, and adding architectural interest.
By building your own pergola, you can create a customized structure that greatly enhances your property’s beauty, value, and functionality. And because hiring professional contractors can be quite expensive, you can save substantial money by building it yourself.
Craftcamp’s pergola plans provide comprehensive guidance for builders of all skill levels. Whether you’re looking to create a shaded retreat, support climbing plants, or define an outdoor entertainment area, the perfect pergola design awaits.
Benefits of Building Your Own Pergola
In addition to cost savings, customization is a significant advantage of constructing your own pergola. With the right DIY plan, you can gain complete control over the pergola dimensions, ensuring a perfect fit for spaces ranging from compact patios to expansive backyards. You can even incorporate special features like built-in seating, planter boxes, and privacy screens.
Beyond pergola dimensions and design features, you can customize the building materials by taking a DIY approach. This ability to choose materials lets you match existing architecture and choose options suited to your local climate, aesthetic preferences and budget.
Fostering a sense of accomplishment and building a structure that connects you deeply to your outdoor space is extremely personally rewarding. After all, this structure will be the site of countless gatherings and quiet moments for years to come.
Your Personalized Pergola Options
Explore these pergola types and styles to find the perfect fit for your outdoor space. Each type offers unique benefits and design possibilities. Further explore in-depth pages for each type to get more information on choosing the best option to meet your unique situation.
- Attached Pergolas
- Freestanding Pergolas
- Modern Designs
- Traditional Styles
Attached Pergolas
Connecting directly to your home, attached pergolas create a seamless transition between your indoor and outdoor living spaces. These designs offer structural advantages by sharing support with your home’s existing framework, which can make them more economical and easier to install than freestanding options. They effectively extend your living space outdoors, providing shelter for outdoor dining areas, hot tubs, or entryway embellishment. Because they excel at shading south- and west-facing windows and doors, they can significantly boost your home’s energy efficiency during summer. The other advantage of attaching the pergola to your home is that you’ll need to install fewer vertical posts.
Freestanding Pergolas
Freestanding pergolas can be positioned anywhere in your landscape, creating a designated space for outdoor entertaining or serving as a defining feature within your garden. Because they stand alone, these independent island structures offer exceptional design flexibility and countless placement options. Consider using a freestanding pergola to form a dining area, surround a fire pit, create a garden room, or highlight special landscape focal points such as fountains or sculptures.
Modern Designs
Modern pergola designs feature clean lines, stark styling, and contemporary materials that complement contemporary home exteriors. These designs often incorporate metal accents, concealed hardware, and geometric precision for a sophisticated aesthetic. The sleek profiles and minimalist structure of modern pergolas make them particularly well suited for urban settings, rooftop gardens, and contemporary architecture. Their streamlined appearance can make smaller spaces feel larger while providing an attractive architectural accent.
Traditional Styles
Traditional pergola designs draw inspiration from classical garden structures with elegant proportions and decorative details. These timeless designs feature graceful curves, decorative rafter end cuts, and classical column styles that compliment historic homes and formal landscapes. The enduring appeal of traditional pergolas makes them a smart investment for property value, while their established aesthetic blends beautifully with mature gardens and historic neighborhoods.
Size and Proportions
Let your available space and intended use set the dimensions of your pergola. For intimate conversation areas or small patios, designs ranging from 8×8 to 10×10 feet provide adequate coverage without overwhelming your space. Larger entertainment areas with lounge furniture, dining sets, and outdoor kitchens might benefit from dimensions of 12×12 feet or more. A 14×16 timber frame pergola creates even more space.
Concentrating exclusively on square footage, some people overlook height considerations that can be equally important. If the headspace is too low, the pergola might feel confining, but if the pergola is too tall, it might lose its sense of intimacy and provide less shade. Most designs feature a clearance height of 7 to 8 feet at the lowest point, with overall heights of 9 to 12 feet to accommodate visually pleasing angled roof rafters that promote effective rain runoff. Common mistakes include confusing the roof edge dimensions with the post footprint; a 12×12 plan often refers to the roof size, while the posts may only be 10 feet apart. Always verify the post-to-post measurements to ensure your furniture fits between the supports. A dining table requires at least 3 feet of “pull out” space for chairs on all sides to remain functional; measuring the clear span between posts rather than the roof edge is critical for fitting furniture.
Garden Integration
Most pergolas are topped with a lattice structure that provides an ideal framework for climbing garden plants such as wisteria, grape vines, clematis, or roses. But this is only one of many ways you can incorporate garden elements into your pergola. Integrated planter boxes create a seamless blend between structure and plantings, allowing for colorful flowers, screening shrubs, or even kitchen herbs, depending on sun exposure. You can also design your pergola with features that accommodate container gardens or raised beds to bring seedlings to a more accessible height.
Shade Options
Traditional pergolas provide filtered light through their open-beam structures, but many customized designs incorporate features for additional shade when and where desired. To redirect shade as the sun moves position throughout the day, you can place adjustable shade systems and weather-resistant fabric panels between rafters. Fixed shade solutions include lattice panels, closely spaced slats, and polycarbonate sheets that may offer protection from precipitation as well as direct sunlight. In areas with high wind loads, open slat designs are preferable to solid roofs as they allow air to pass through rather than creating uplift pressure.
Privacy Features
Do you want to shield your outdoor living space from neighboring properties or public streets? You can make your space far more intimate with integrated privacy screens on one or more sides of your pergola. Screens allow you to create a sense of enclosure without sacrificing your pergola’s distinctive open-air character. Other privacy options include slatted panels, decorative lattices, planted trellises, or outdoor curtains that can be drawn when desired. These features can also provide valuable wind protection in exposed locations. And roll-up shades mounted to the vertical posts can effectively block blinding rising and setting sun rays.
Construction Difficulty Level
Regardless of your woodworking knowledge and skill, Craftcamp has a pergola plan for you. Beginner-friendly designs feature simplified joinery, standard lumber dimensions, and minimal decorative cuts. Any DIY homeowner with a commitment to their project and a basic mastery of measuring, cutting, and fastening techniques can successfully complete a pergola project over a few weekends.
Materials
Natural wood has long been the most popular material for pergolas due to its beauty and availability. Wood is also quite easy to work with. Cedar and redwood offer excellent natural resistance to decay and insects, making them ideal choices for long-lasting outdoor structures. Pressure-treated lumber can be a cost-effective alternative that delivers solid durability when properly sealed and maintained. The tops of posts and the ends of beams are where wood sucks up water like a straw; treating these end grains with preservative is essential to prevent rot from the inside out.
When selecting your lumber, the choice between 4×4 and 6×6 posts is critical for both aesthetics and structural integrity. While 4×4 posts are sufficient for smaller 8×10 structures, they are prone to twisting and warping over time. 6×6 posts provide superior weight-bearing capacity for heavy rafter spans and offer a more substantial visual anchor that prevents the structure from looking spindly. For spans greater than 12 feet, 6×6 posts are a structural necessity.
If you are willing to shoulder extra expense, you can use a range of composite materials offering the look of wood without its vulnerabilities. Some designs incorporate metal elements for structural support or decorative accents, adding increased durability or contemporary flair. And structural-fiberglass support columns can add a classic architectural touch to any pergola.
Timber Frame Considerations
For builders seeking maximum longevity and a grand aesthetic, Timber Frame Plans utilize large, heavy timbers joined with traditional wood-to-wood connections rather than simple nails and screws. This creates a skeleton that can stand on its own for decades, relying on gravity and precise joinery to transfer weight straight down to the foundation.
Key structural elements in these designs include the King Post and truss systems. A King Post is a central vertical post that stands on a crossbeam and supports the roof peak; it works by pulling the horizontal beam upward to prevent sagging under the roof’s weight. This engineering allows for wider open spans between posts, creating an unobstructed view perfect for large dining areas. However, be aware that large timbers like 8x8s are extremely heavy. A single beam can weigh hundreds of pounds, meaning you cannot build these alone and often need a crane or a team of people for the “raising” day. Reviewing photos of the raising process reveals the specific assembly order, which often differs from the finished plan drawings. Additionally, the immense weight requires concrete piers that extend below the frost line to prevent the structure from sinking into soft soil.
Foundation Requirements
Most freestanding designs require concrete footings that extend below the frost line in colder climates to prevent seasonal movement. Attached pergolas typically share support with your home’s structure but still require proper footings for outer posts. Foundation options include concrete piers with post anchors, poured footings with embedded hardware, or heavy-duty ground spikes for smaller structures in protected areas. Most plans provide detailed specifications for foundation requirements based on the pergola’s size and local building codes. The specific timber weight (dead load) dictates the depth and width of the foundation; a 14×14 structure requires significantly thicker concrete pads than standard deck footings to prevent settling.
Hardware Selection and Structural Systems
Modern pergola construction often moves beyond traditional joinery by utilizing specialized hardware. For example, learning how to build a pergola with Simpson Strong-Tie connectors allows for faster assembly and enhanced structural ratings. Their Outdoor Accents Decorative Hardware Line combines the aesthetic of black powder-coated steel with rated structural strength, eliminating the need for complex mortise and tenon cuts. These systems also facilitate a pergola without knee bracing by using rigid post bases that resist moment forces, replacing the traditional triangular bracing that can obstruct headroom. Steel channel reinforcement is often added to the top of beams in these systems to prevent sagging over long spans. Builders should consult technical reviews for each hardware line to ensure the load ratings match their specific snow and wind requirements.
Tools Needed
Basic pergola construction requires common carpentry tools that many homeowners already own or can easily rent, borrow, or buy. Essential tools include:
- A circular saw or miter saw
- cordless drill/driver
- jigsaw
- tape measure
- level
- square
Larger and more complex designs may benefit from additional tools such as a post-hole digger, concrete mixing equipment, and ladder or scaffolding tall enough to work safely at the pergola’s maximum height.
Safety equipment, including gloves, dust mask, and eye and hearing protection, is essential for all pergola projects.
Permit and Zoning Considerations
Many municipalities require permits for permanent structures like pergolas, particularly when attached to your home. Zoning and HOA regulations may dictate setbacks from property lines, height restrictions, or design limitations in certain neighborhoods. Fortunately, most pergola plans can be easily modified to comply with local regulations while maintaining their structural integrity and aesthetic appeal.
Get Started Today
Begin your pergola project with some careful planning. Establish your intended location, noting any utility lines, vegetation, grade changes, and other obstacles that might affect construction. Consider sun patterns throughout the day and changing seasons to optimize shade benefits and determine the best orientation for your pergola. The degree of shade coverage should be carefully considered based on your climate and the pergola’s primary purpose.