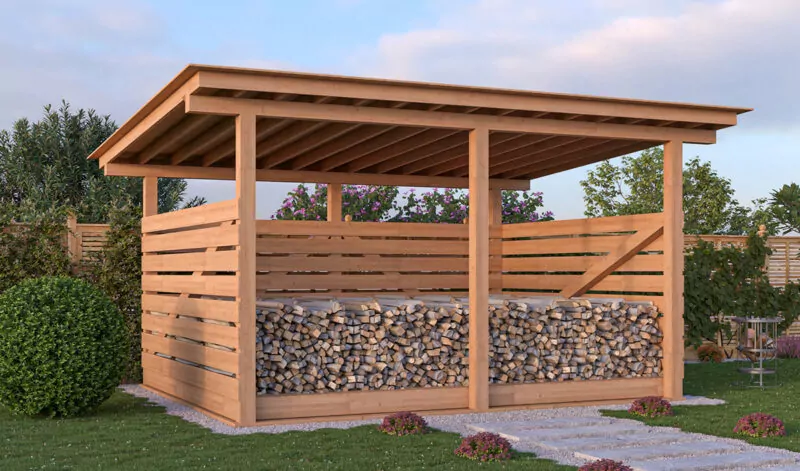
Building a shed from scratch can seem overwhelming, with precise measurements, cutting lists, and construction sequences to manage, it’s easy to get lost in the details. This guide walks you through constructing a 12×16 lean-to storage shed, perfect for storing gardening tools, lawn equipment, and seasonal items. While the process involves many steps, having proper shed plans simplifies everything by providing clear dimensions, material lists, and step-by-step instructions that take the guesswork out of your build.
12’x16′ Shed Plans – Shopping List
Shopping List
- 2 – pressure treated 2×8 – 16′
- 13 – pressure treated 2×8 – 12′
- 4 – pressure treated 4×4 – 16′
- 50 – pressure treated 2×4 – 8′
- 20 – pressure treated 2×4 – 16′
- 13 – pressure treated 2×6 – 14′
- 20 – 9/16″ plywood – 4’x8′ sheets
- Wood siding boards (1/2″ x 6″)
- 4 rolls – building paper (#15)
- 235 ft² – asphalt shingles
- 50 ft – metal drip edge
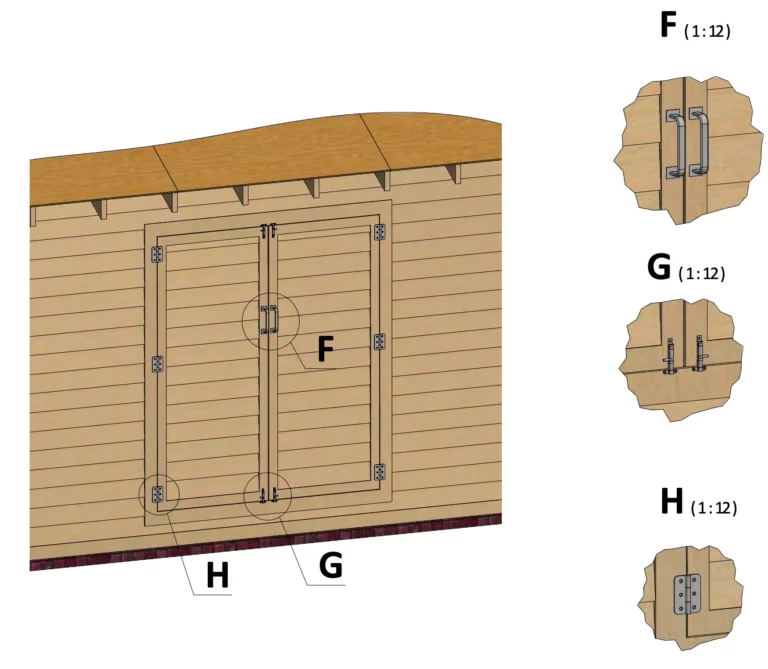
- 6 – door hinges (3″)
- 2 – door pulls (6″)
- 4 – surface bolts (4″)
- 225 – clay bricks (3 5/8″ x 2 1/4″ x 8″)
- 3.2 yd³ – concrete
- Galvanized nails (2″)
- Wood screws (1″, 2″, 3″, 5″)
12’x16′ Shed Plans – Cutting List
Cutting List
- 2 – pressure treated 2×8 – 16′ (rim joists)
- 13 – pressure treated 2×8 – 11′-9″ (floor joists)
- 4 – pressure treated 4×4 – 16′ (skids)
- 6 – 9/16″ plywood – 4’x8′ (floor sheathing)
- Wall studs – 2×4 – 7′-3″
- Top/bottom plates – 2×4 – 16′ and 11′-5″
- 13 – 2×6 – 13′-3 1/4″ (rafters)
- 9/16″ plywood – roof sheathing (cut to size)
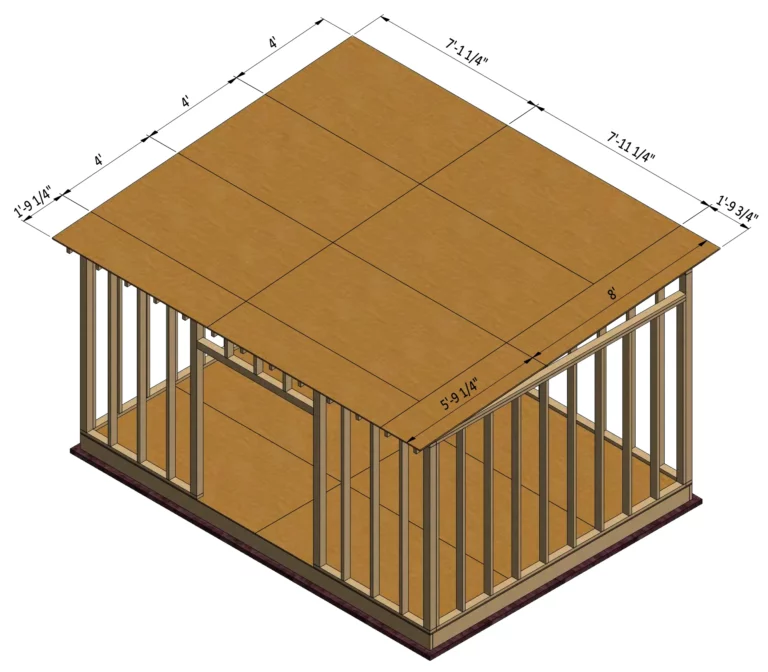
Step 1: Site Preparation
Clear the area where you want to build the shed. Layout the foundation using the dimensions shown in the illustration.

Dig six trenches at least 1′ wide and 1′ deep for the foundation. In cold-weather regions, dig down to the frostline.
Step 2: Foundation
Fill the trenches with concrete and allow to cure overnight.
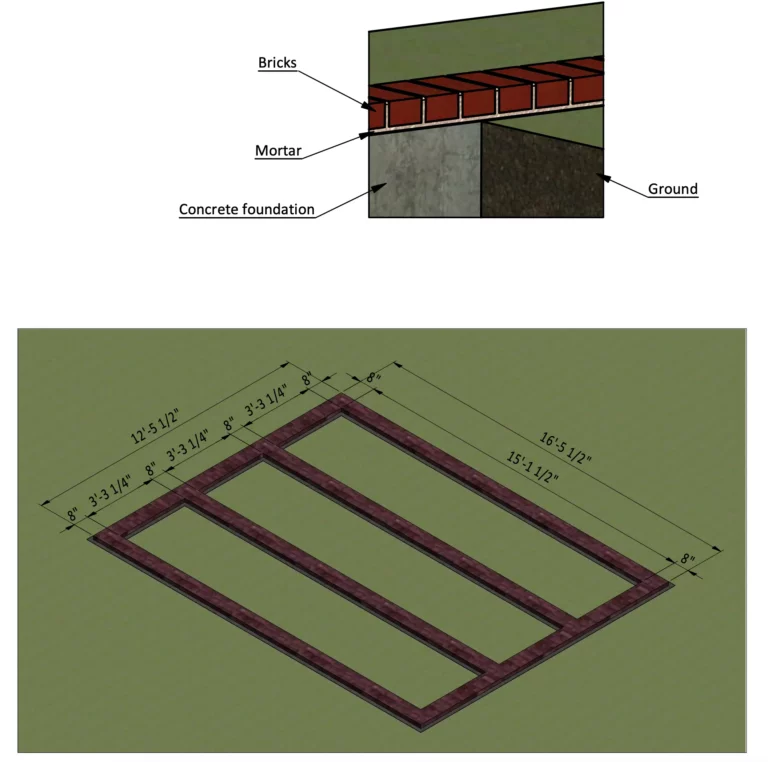
Lay clay bricks across the foundation with ⅜” mortar joints. You will need roughly 225 bricks.
Step 3: Floor Frame
Build the floor frame using pressure-treated 2×8s. Cut two 2×8s to 16′ for the rim joists and thirteen 2×8s to 11′-9″ for the floor joists. Nail together with 3″ nails. Floor joists 16″ O.C.

Attach the 4×4 skids to the bottom of the floor frame. Square the frame by measuring diagonally until both sides are equal.

Step 4: Floor Sheathing
Cut to size and install 9/16″ plywood floor sheathing. Secure with 2″ deck screws.

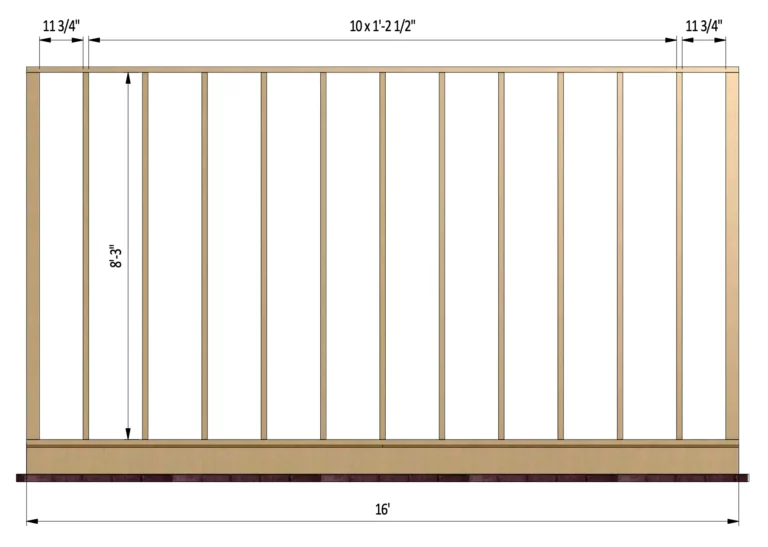
Step 5: Wall Frames
Build the front and back wall frames using 2×4 lumber. Wall studs are 16″ O.C. Assemble using 3″ nails.

Build the side wall frames the same way. If adding a double door, frame the opening accordingly.

Step 6: Raise Walls
Stand each wall frame on the floor deck. Secure to the floor and to each other at corners using 3″ screws.

Step 7: Top Plate
Double-up the top plate on the front and side walls. This ties the walls together and provides support for the rafters.
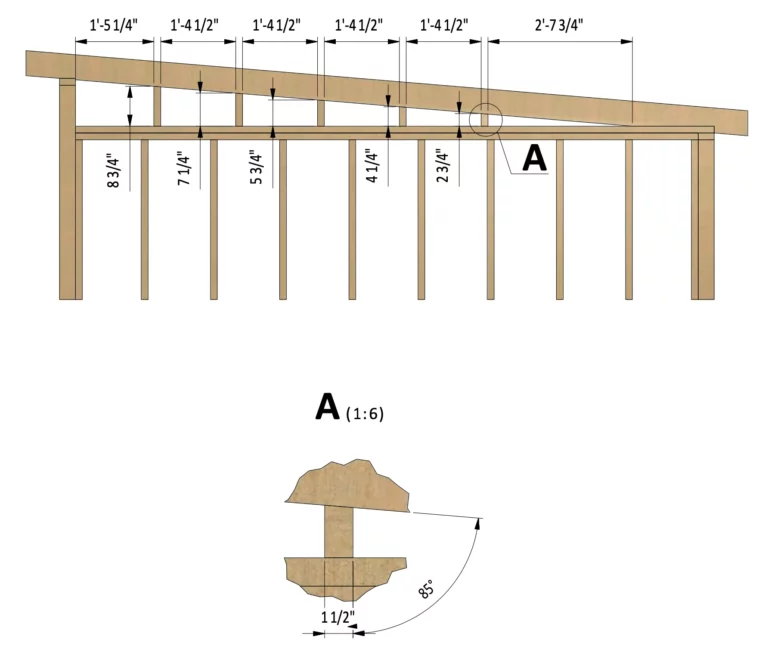
Step 8: Roof Rafters
Cut thirteen 2×6 rafters to 13′-3 1/4″. Install rafters 16″ O.C. Toenail through the rafter and into the top plate.

Step 9: Roof Sheathing
Measure, cut, and install 9/16″ plywood for the roof deck. Secure with 2″ nails.
Step 10: Roofing
Install building paper, drip edge, and asphalt shingles.
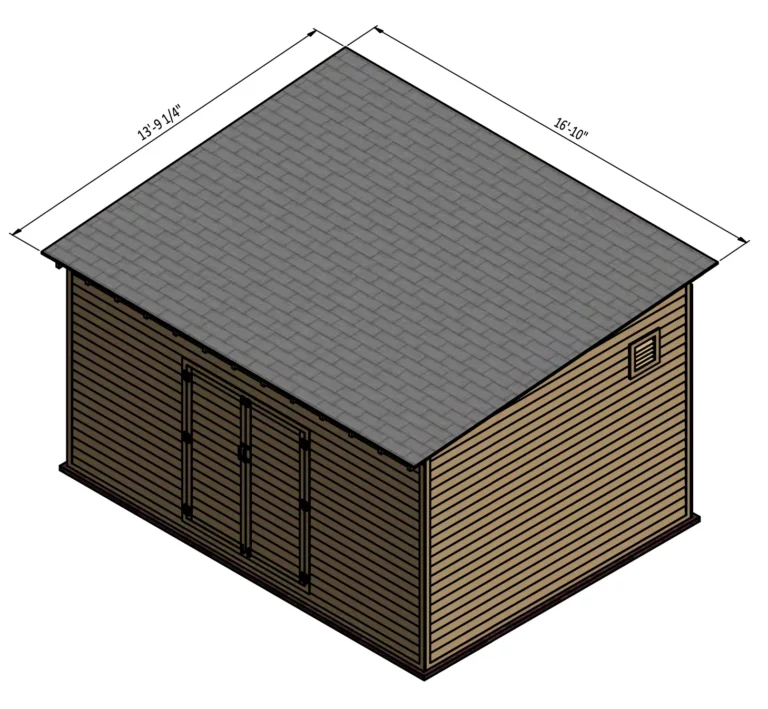
Step 11: Siding
Install wood siding using 1 1/4″ finishing nails.


Step 12: Doors & Trim
Build and install doors. Install 1×4 trim around doors and corners.