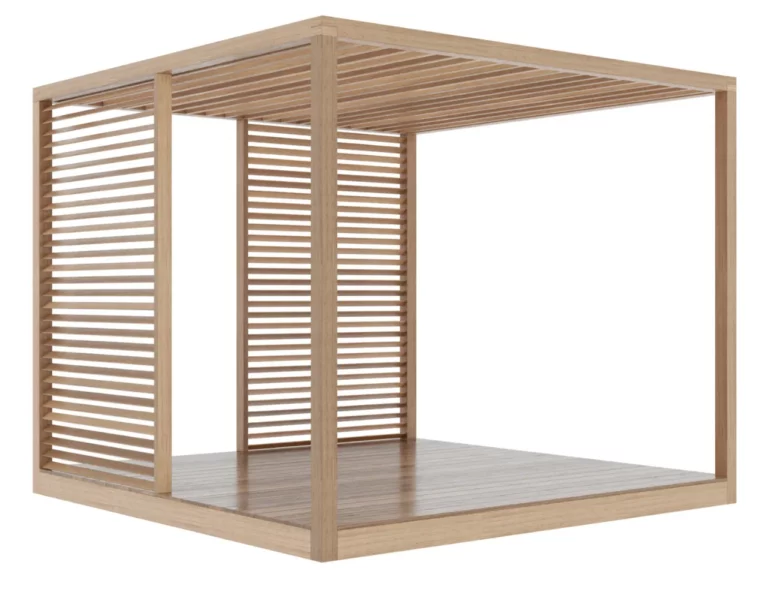
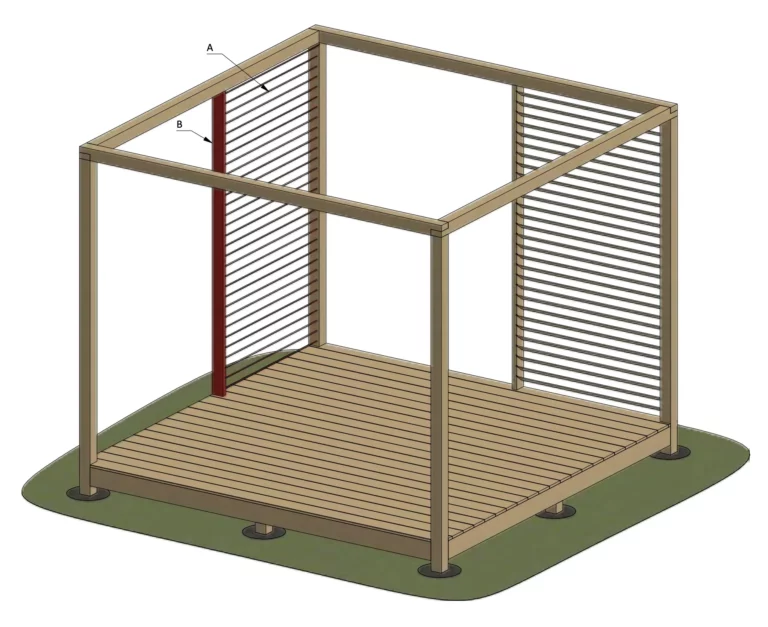
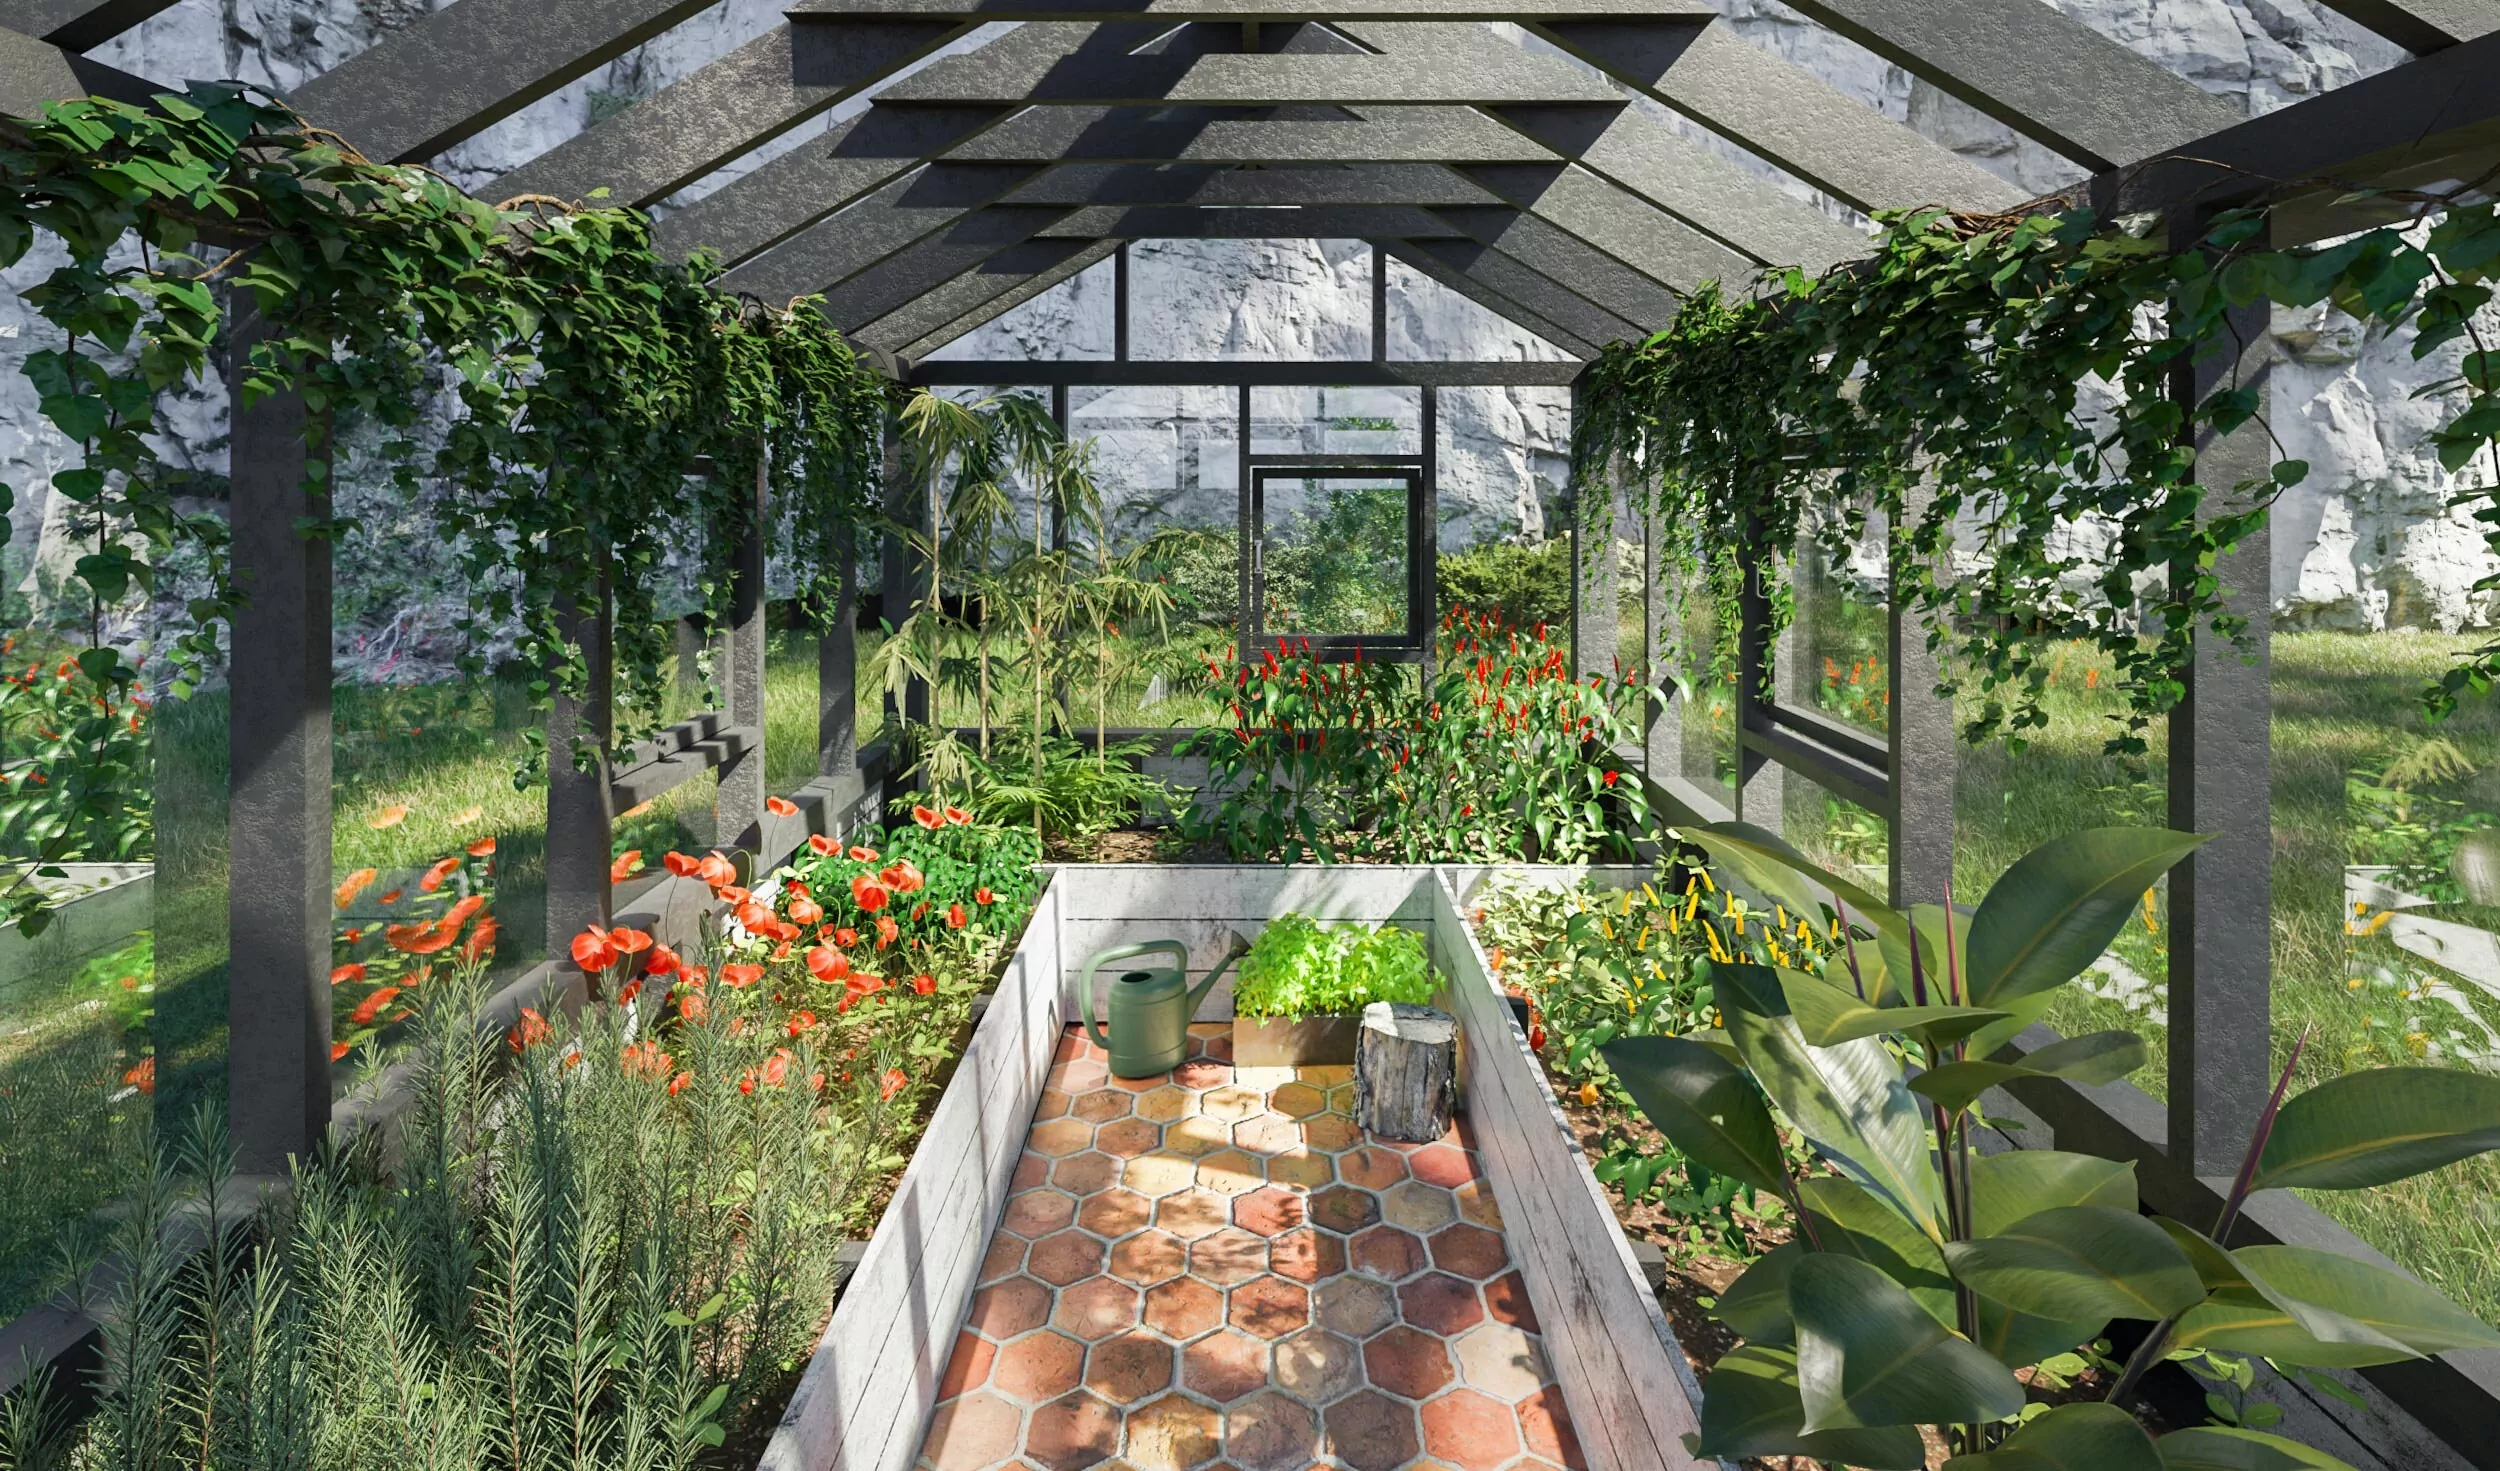
In this article, we are going to guide you through the process of building a beautiful 10×10 pergola that will enhance your outdoor living space. Our step-by-step plan is designed to help you construct a sturdy and attractive pergola, even if you have limited carpentry experience.
| 10’x10′ pergola shopping list | ||||
| Main Frame | Unit | Qty | Size | Note |
| Lumber (1/4 x 3 ) | pcs | 58 | 4′ | |
| Lumber (1 x 6 ) | pcs | 22 | 10′ | |
| Lumber (2 x 4 ) | pcs | 2 | 8′ | |
| Lumber (2 x 4 ) | pcs | 19 | 10′ | |
| Lumber (2 x 6 ) | pcs | 11 | 10′ | |
| Lumber (4 x 4 ) | pcs | 4 | 8′ | |
| Lumber (4 x 4 ) | pcs | 5 | 10′ | |
| Fasteners & Hardware | Unit | Qty | Size | Note |
| Face-Mount Joist Hanger, 2×8 | pcs | 22 | ||
| Wood screws (1″) | pcs | 150 | ||
| Wood screws (2″) | pcs | 250 | ||
| Wood screws (3″) | pcs | 160 | ||
| Wood screws (5″) | pcs | 90 |
| 10’x10′ pergola cutting list | ||||
| Main Frame | Unit | Qty | Size | Note |
| Lumber (1/4 x 3 ) | pcs | 58 | 4′ | Blind bar |
| Lumber (1 x 6 ) | pcs | 22 | 10′ | Decking board |
| Lumber (2 x 4 ) | pcs | 2 | 7′-5 3/4″ | Stud |
| Lumber (2 x 4 ) | pcs | 19 | 9′-5″ | Top joist |
| Lumber (2 x 6 ) | pcs | 4 | 9′-5″ | Rim joist |
| Lumber (2 x 6 ) | pcs | 7 | 9′-9″ | Joist |
| Lumber (4 x 4 ) | pcs | 5 | 1′-8 1/2″ | Stud |
| Lumber (4 x 4 ) | pcs | 4 | 8′ | Stud |
| Lumber (4 x 4 ) | pcs | 4 | 10′ | Top beam |
| Fasteners & Hardware | Unit | Qty | Size | Note |
| Face-Mount Joist Hanger, 2×8 | pcs | 22 | ||
| Wood screws (1″) | pcs | 150 | ||
| Wood screws (2″) | pcs | 220 | ||
| Wood screws (3″) | pcs | 120 | ||
| Wood screws (5″) | pcs | 40 |
Step 1: Ground Works
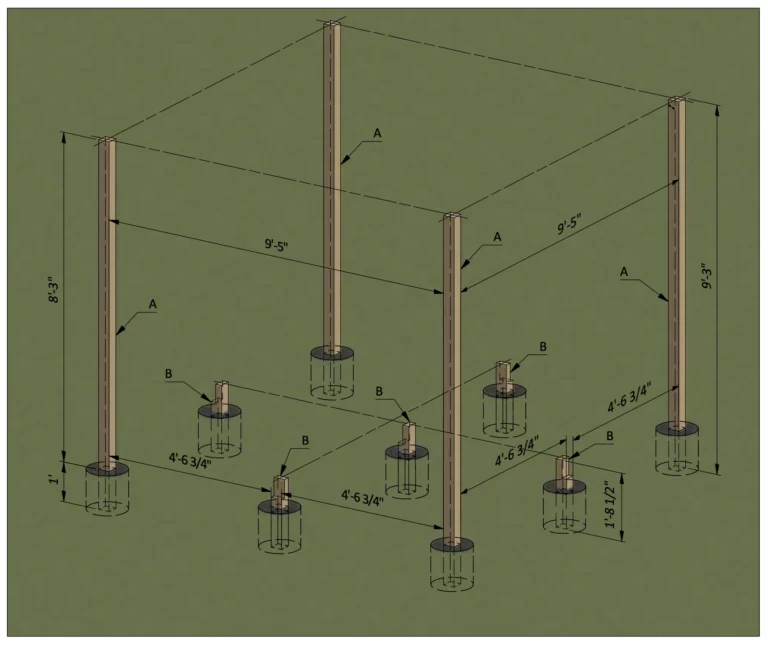
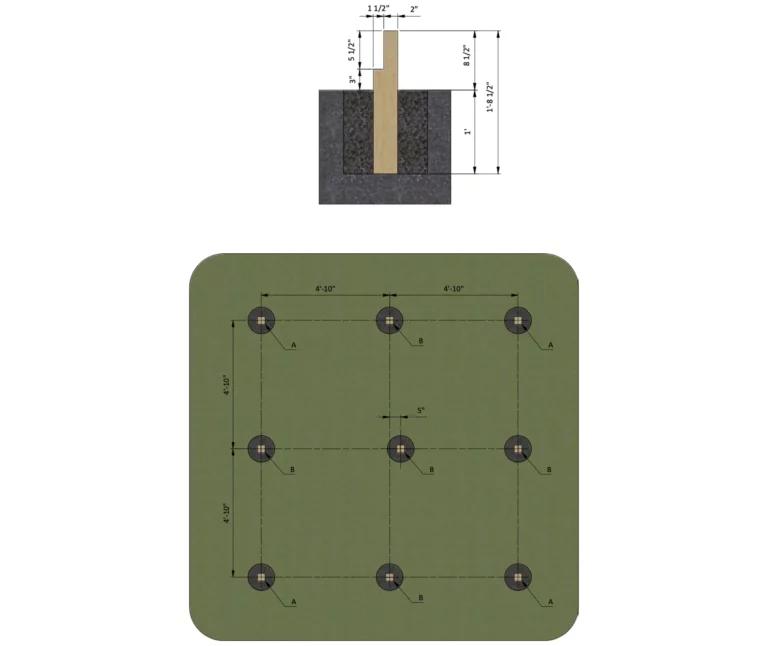
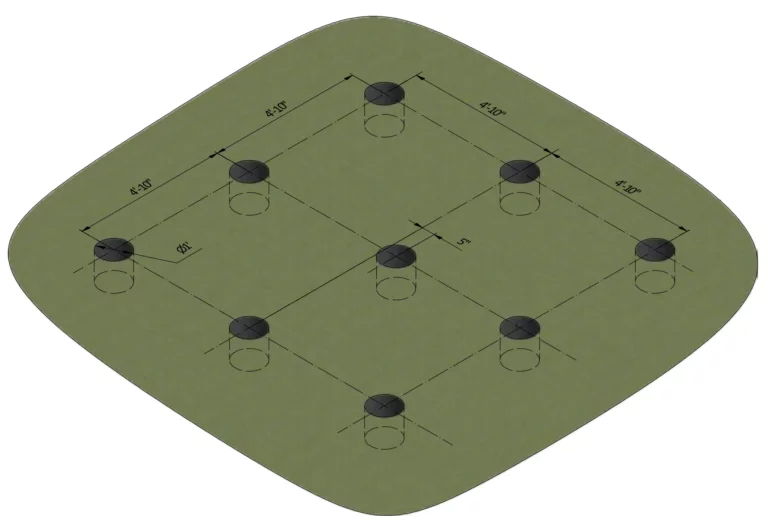
1.1 Clear the area where you want to build the pergola, then measure and lay out the foundation, using the illustration shown below as a guide.
1.2 Dig nine holes, each measuring 1 ft. diameter x 1 ft. deep. Note that in cold-weather regions, you may need to dig down to the frostline; check with your local building department for specific requirements.
1.3 Treat the area with a herbicide to kill any weeds.
Step 2: Foundation Preparation
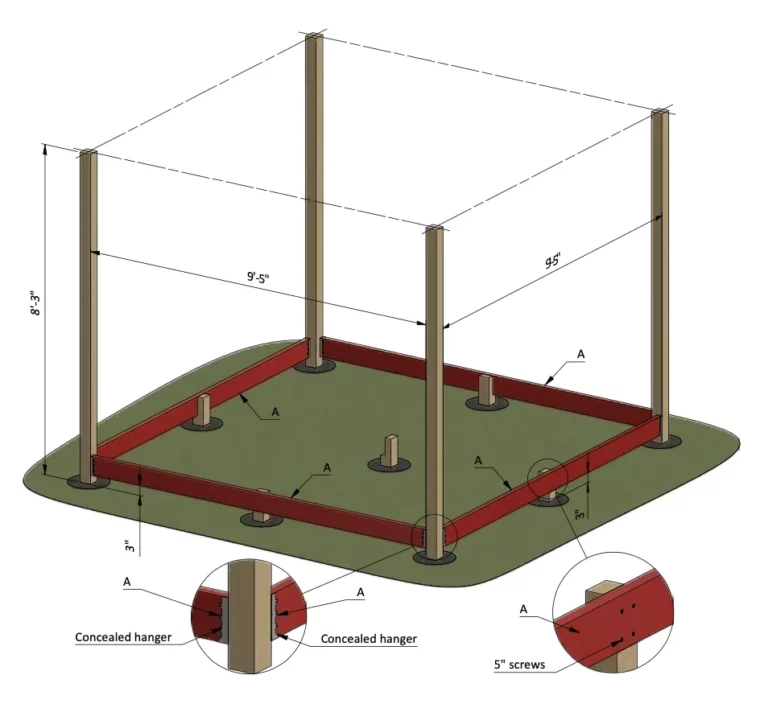
2.1 Using pressure-treated 4x4s, prepare studs using the drawing below as a reference. You will need four 4x4s cut to 9′-3″ and five 4x4s cut to 1′-8 1/2″.
2.2 Cut a 1 1⁄2 x 5 1⁄2 in. notch into each of the five shorter 4x4s to accept the 2×6 floor joists. When building the pergola uneven terrain, you’ll need to lengthen some of these shorter 4x4s to ensure they’re all level with one another.
2.3 Stand the 4×4 studs into the holes, making sure each is perfectly plumb, and then fill the holes to ground level with concrete. Use a trowel to slope the top of the concrete away from each stud to drain away water. Let the concrete cure overnight.
Step 3: Assemble the Floor Frame
3.1 Cut the four perimeter rim joists from 2×6 pressure-treated lumber. Using the illustration below as a reference, cut four 2x6s to 9′-5″.
3.2 Secure the perimeter joists to the tall corner studs with metal joist hangers and 2″ screws. Attach the joists to the shorter, notched posts with 2 ½-in.screws
Step 4: Assemble the Top Beams
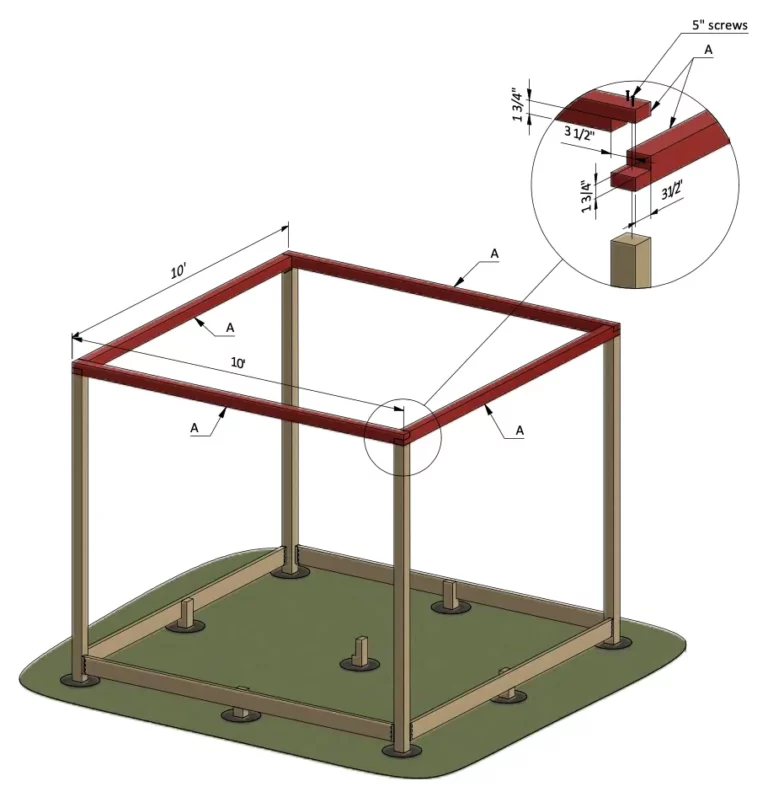
4.1 Cut the four top beams from pressure-treated 4×4s, making each one 10 ft. long. Next, cut 1 ¾-in.-deep x 3 ½-in.-wide half-lap joints into both ends of each beam. Set the beams on top of the four corner studs, making sure the half-lap joints are fitted tightly together.
4.2 Connect the beams to the corner studs with 5″ screws.
4.3 Be sure to use a framing square to confirm the beam corners are 90°.
Step 5: Framing the Pergola's Floor
5.1 Assemble the floor frame using pressure-treated 2×6s. You will need seven floor joists cut to 9′-9″.
5.2 Secure the ends of the floor joists to the perimeter rim joists boards with metal joist hangers and 1 ½ in. screws. Fasten the floor joists to the notched studs with 2 ½ in. screws.
5.3 Again, use a framing square to ensure the corners form a 90° angle.
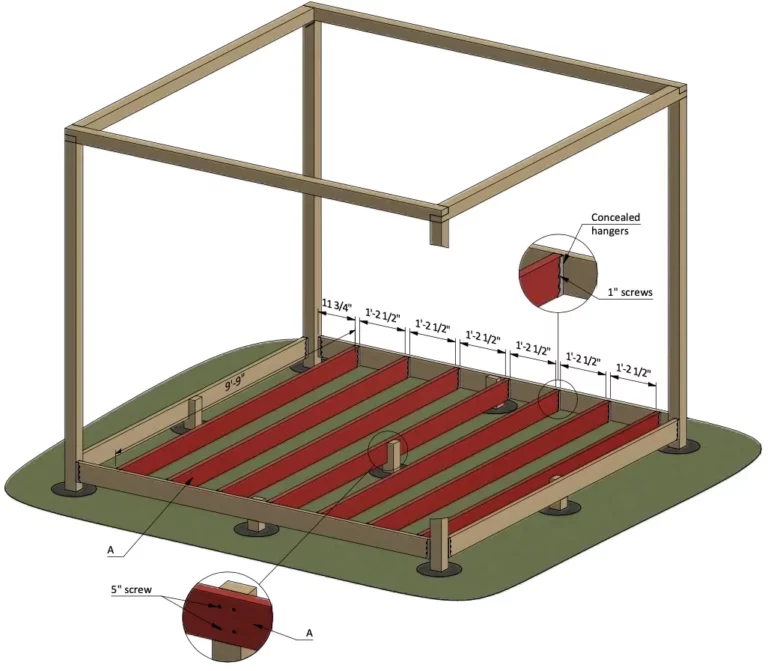
Step 6: Install the Deck Floor
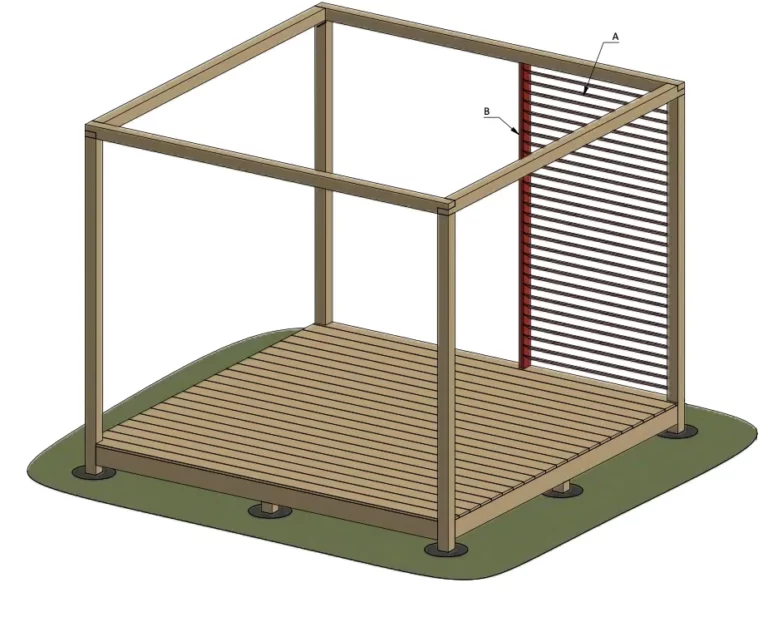
6.1 Make the floor of the pergola out of pressure-treated 1×6 decking boards, as illustrated below. Cut 22 deck boards to 10′ long. Where necessary, notch the ends of the deck boards to fit around the corner studs.
6.2 Secure the decking to the floor joists with 2″ screws.
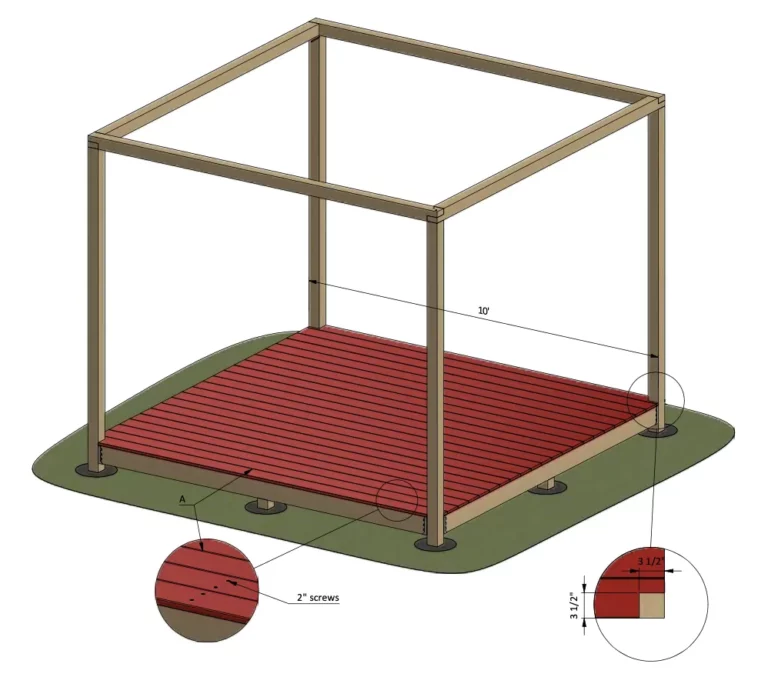
Step 7: Assemble the Back Wall Frame
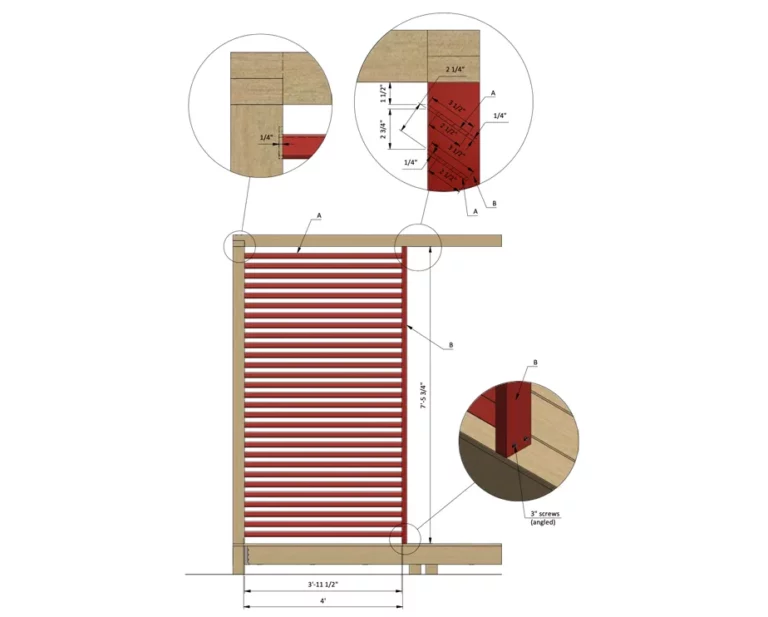
7.1 Using 2 x 4 pressure-treated lumber, cut one stud to 7′-5 3/4″ long, as shown below.
7.2 Then, cut twenty-nine 1/4 x 3 in. boards to 4′ long each to create the angled louvers. To install the louvers, use a router fitted with a ¼-in.-dia. straight bit to rout a series of 1/4″ deep x 3 ½ in. long angled slots into the sides of the 2×4 stud and 4×4 corner stud. Use a clamped-in-place guide, set at 60 degrees, to create the angled slots.
7.3 Attach the 2×4 stud with 3″ wood screws, making sure it’s perfectly plumb. Slide the louvers into the angled slots.
Step 8: Assemble the Left Wall Frame
8.1 Repeat the process in Step 7 to make one 2×4 stud and 29 louvers for the left side of the pergola.
8.2 Again, cut the 4-ft.-long louvers from 1/4 x 3 boards, and set them in angled slots routed into the 2×4 stud and 4×4 corner stud.
Step 9: Assemble the Overhead Beams
9.1 The top of the pergola is crowned with 19 overhead beams cut from pressure-treated 2×4s. Cut each beam to 9′-5″ and fasten them with 6-in. structural screws driven through the 4×4 top beams and into the ends of each overhead beam.
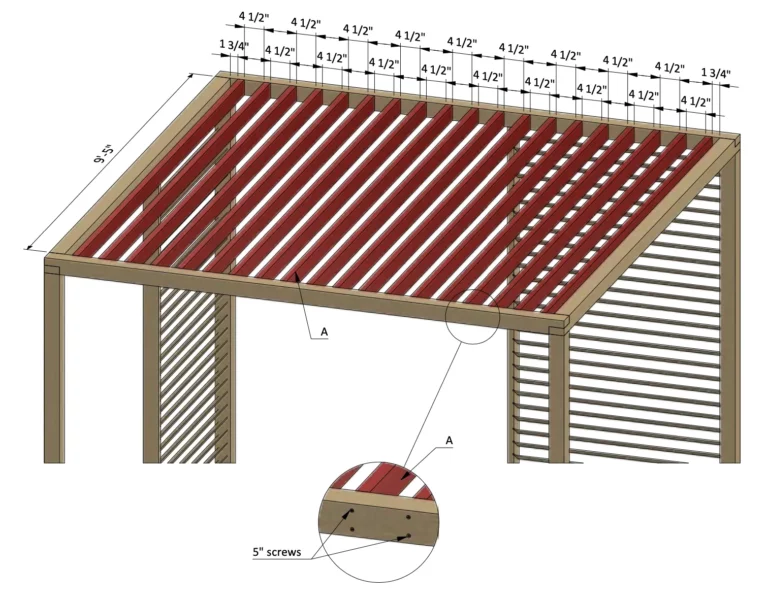
Step 10: Thank You
Now that your pergola is all done, you are ready to decorate it any way you want using your favorite paint, stain, or clear wood preservative.
