KEY POINTS
- Skill level: Intermediate
- Time: 2 to 3 hours
- Estimated cost: $40 to $90
- Result: 2' x 4' cold frame
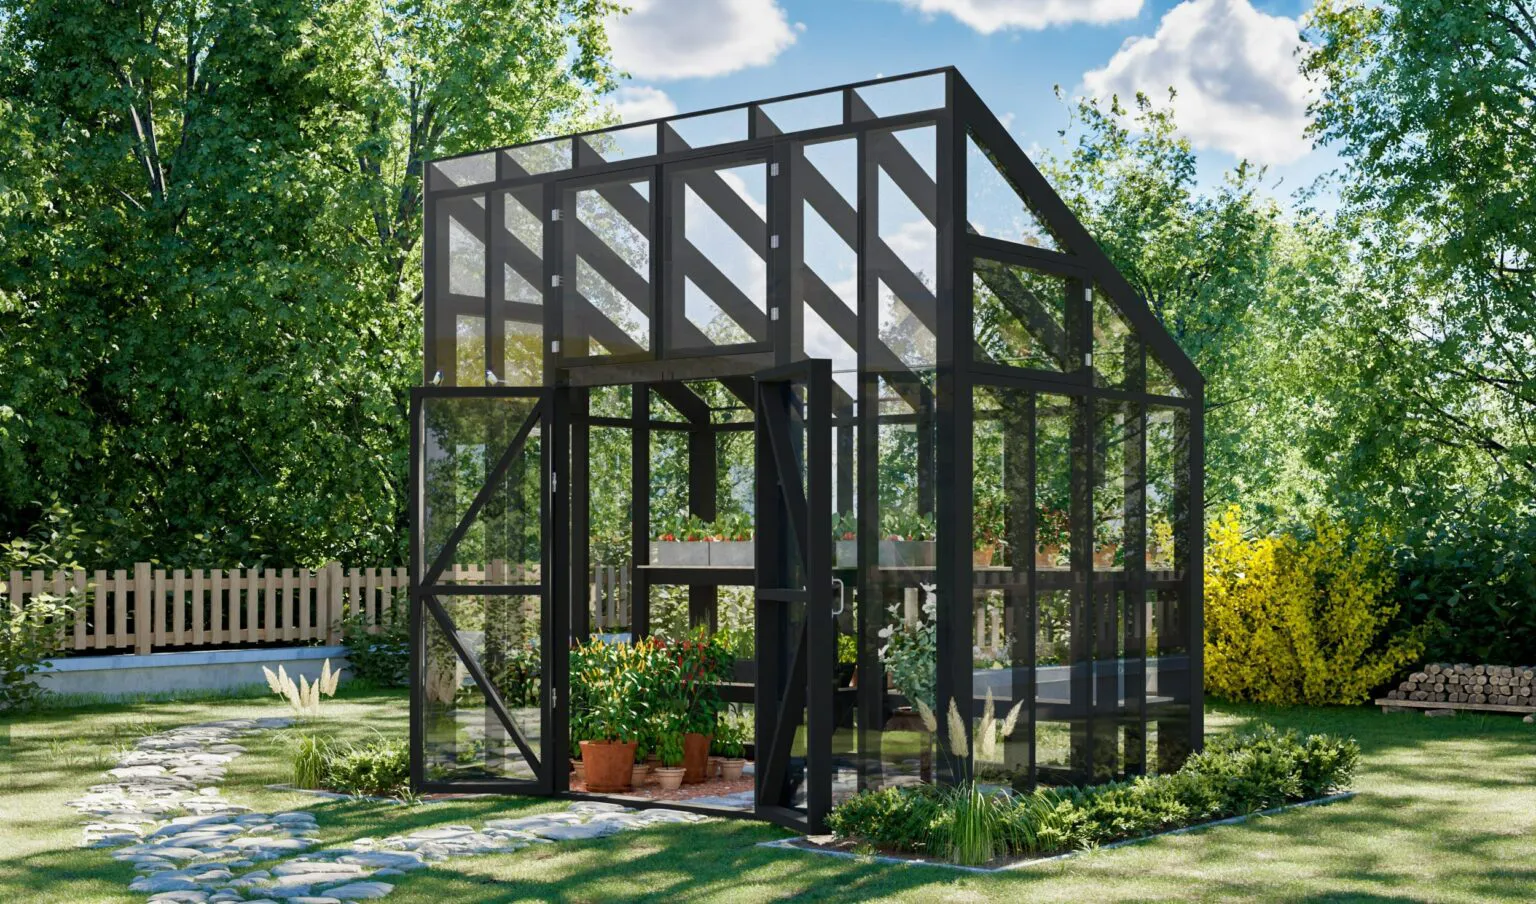
Cold frames are an excellent addition to any gardener’s toolkit. These small greenhouses are made up of a frame and a transparent lid that traps solar heat to warm the soil inside. It’s worth learning how to build a DIY cold frame, as this simple structure is all you need to extend your growing season year-round.
Introducing a cold frame into your garden can provide an extra three to six weeks of growth in spring and an additional four to eight weeks in fall, depending on your climate. The inner temperatures sits around five to 10 degrees warmer, providing ideal conditions for your favorite plants. This guide will give you everything you need to build a DIY cold frame, from the skills needed to step-by-step instructions.
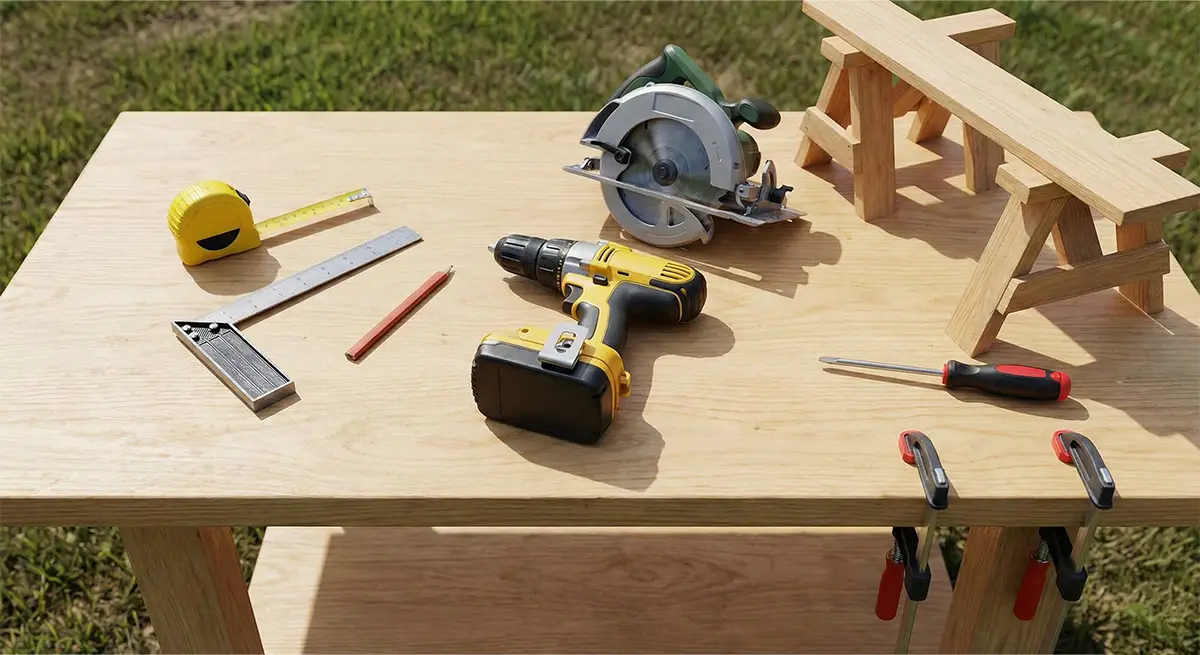
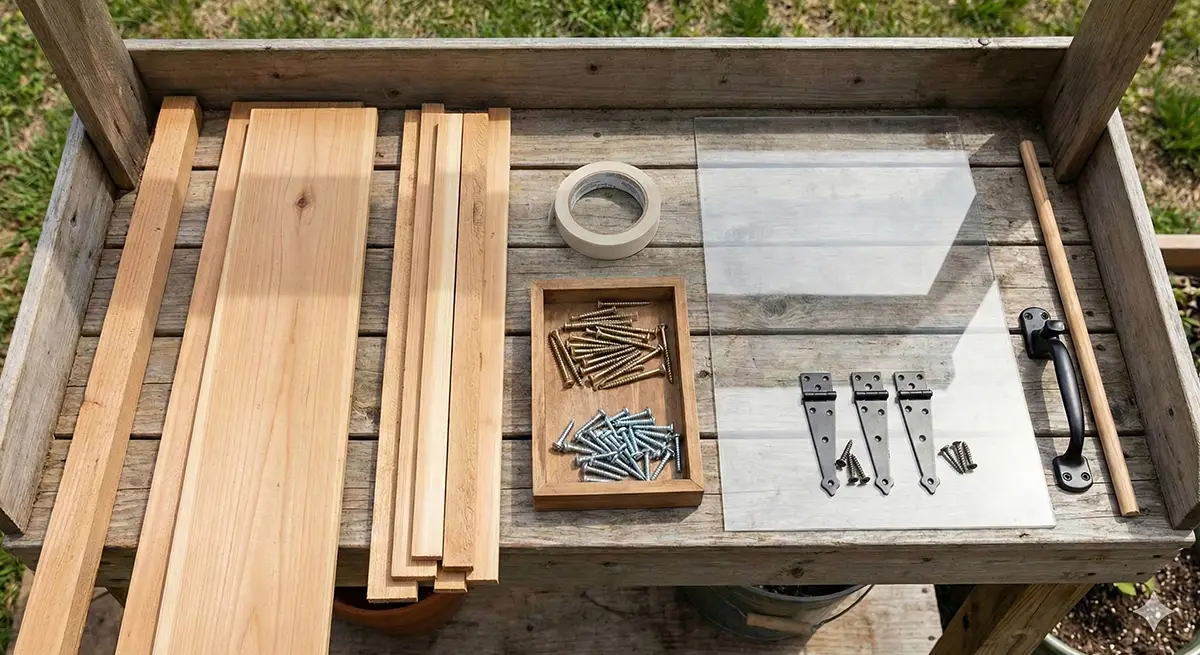
What You’ll Need: Tools and Materials
Here is the list of tools and materials you’ll need for constructing your cold frame.
Tools List
- Tape measure
- Carpenter’s square
- Pencil
- Drill
- Circular saw
- Sawhorses
- Screwdriver
- 2 clamps
Materials List for a 2-Foot by 4-Foot Cold Frame
- 1 cedar board (2” x 2”), 8’ long
- 3 cedar boards (1” x 12”), 8’ long
- 5 cedar boards (1” x 2” dimensional), 8’ long
- 38 wood screws (2”)
- 35 pan head screws (1 ¼”)
- 1 acrylic or polycarbonate sheet (26” x 48”)
- Glazing material
- 3 strap hinges with screws (3”)
- 1 storm door handle
- Optional: Prop stick, insulation, handles, automatic vent
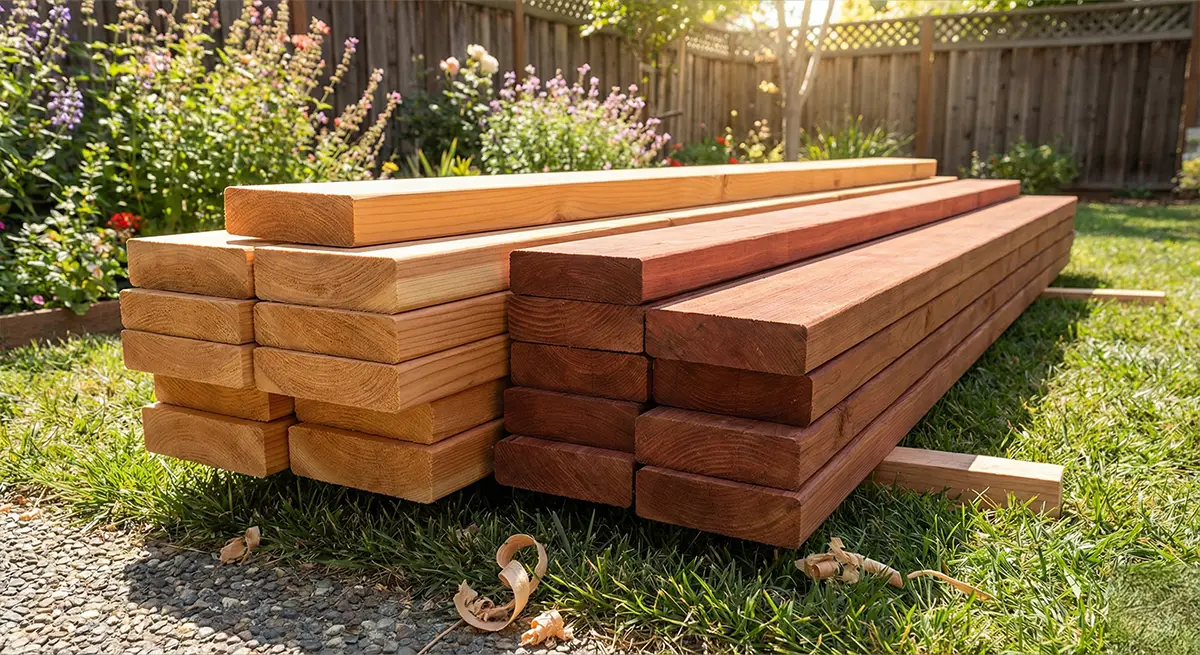
Pro Tip: Opt for new cedar or redwood lumber, which is naturally resistant to decay. If you choose reclaimed wood, make sure it isn’t coated with lead paint, as it can leach into the soil. Unsure? Skip reclaimed wood altogether.
Instructions for Building a DIY Cold Frame
Now that you have the necessary materials and tools, you can jump into this step-by-step tutorial for creating your own cold frame.
Step 1: Plan Your Dimensions and Cut the Wood
Before you make the first cut, start by planning out the dimensions of your DIY cold frame. If you’ve chosen reclaimed windows as the lid, you’ll want to match the dimensions of the frame to the lid.
Otherwise, consider the following factors:
- If you’re building a raised garden bed and you’d like to place the cold frame on it, plan the dimensions so that the rectangular base will sit on the walls of the bed without leaving any gaps.
- To place the cold frame over an in-ground row garden or square-foot garden, plan the dimensions so that the rectangular base forms the perimeter of the area that you want to protect.
Next, you’ll need to plan for the cold frame’s slope.
Step 1.1 Configure the Slope
There’s a reason cold frames are built with a slope. This useful angle maximizes the amount of sunlight that gets in, giving your plants more light and creating that much-needed greenhouse effect.
For Northern Hemisphere gardens, the tallest side should always be to the north, and the shortest side to the south. This means the sun will enter at a more direct angle, especially during those vital spring and fall months.

Most cold frames measure roughly 11 inches high in the front, and between 18 and 24 inches high in the back. This height is usually best for all types of seedlings in spring, and works just as well for encouraging plant growth long into fall.
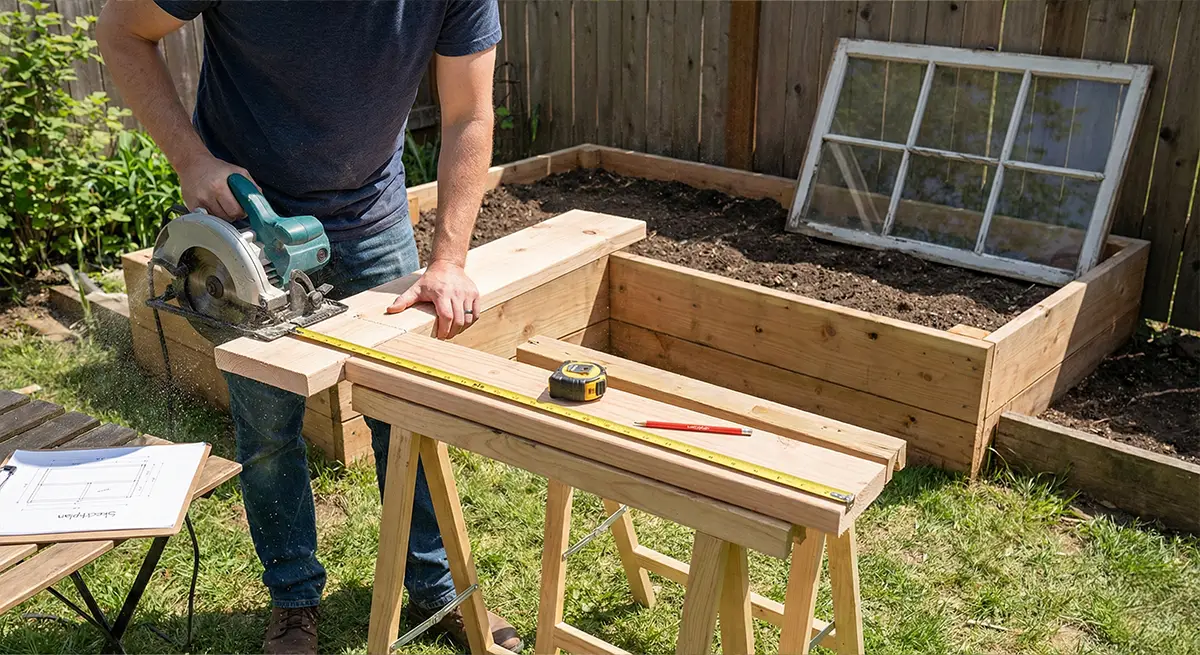
Step 1.2 Make Your First Cuts
After finalizing your cold frame dimensions, measure and cut the wood to match. We’ve put together a handy cut list below for you to reference when building a 2-foot by 4-foot cold frame.
2×4 Cold Frame Cut List
| Cold Frame Base | Cut to Length | QTY | Note |
| Cedar lumber (2″ x 2″ dimensional, 1.5″ x 1.5″ actual) | 23″ | 2 | Back corner supports |
| Cedar lumber (2″ x 2″ dimensional, 1.5″ x 1.5″ actual) | 11″ | 2 | Front corner supports |
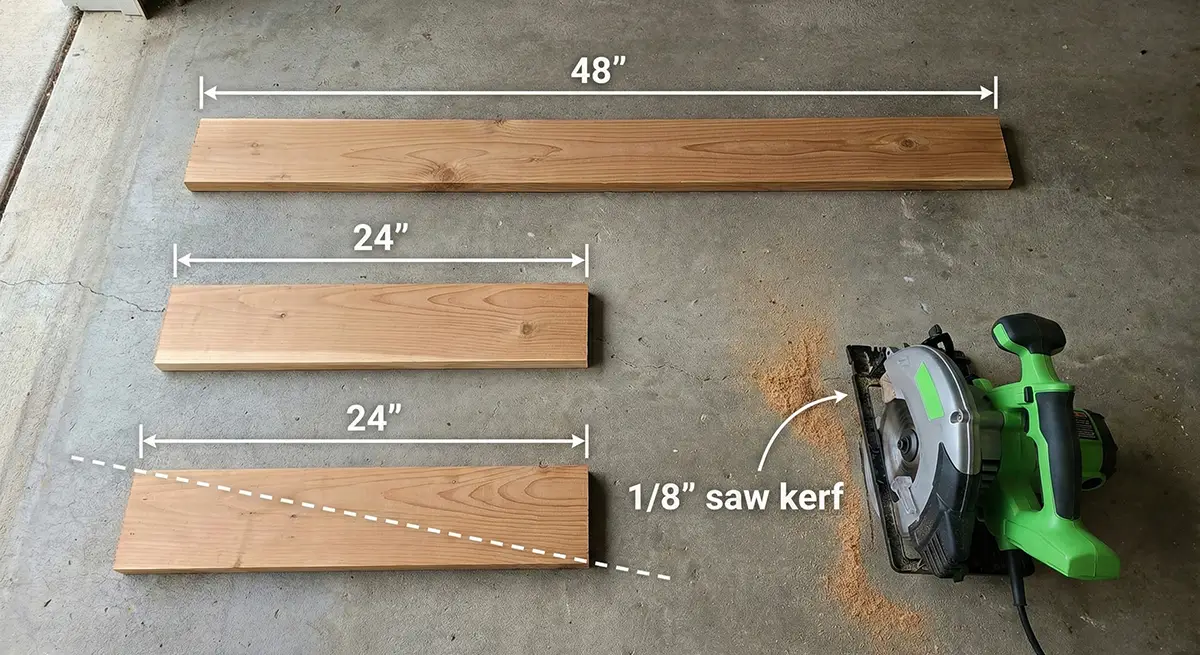
| Cedar lumber (1″ x 12″ dimensional, 3/4″ x 11 3/4″ actual) | 48″ | 3 | Front and rear boards |
| Cedar lumber (1″ x 12″ dimensional, 3/4″ x 11 3/4″ actual) | 22 1/2″ | 2 | Sideboards |
| Cedar lumber (1″ x 12″ dimensional, 3/4″ x 11 3/4″ actual) | 23 1/4″ | 2 | Angled sideboards |
Pro tip: Most circular saws have a saw kerf of 1/8″, and it’s always worth accounting for when you’re cutting multiple pieces. Cut along either the left or the right side of the cut line as needed so that your cut pieces don’t come up 1/8″ short.
Step 2: Assemble the Rectangular Base
Next, you’ll assemble the base, starting with the sides and moving onto the front and back.
Step 2.1: Assemble the Sides
Clamp one of the 11-inch front corner supports to one end of a 22 1/2-inch board, and one of the 23-inch corner supports to the opposite end of the board. Make sure that the bottom of each support is flush with the bottom of the board. Drill three pilot holes at the top, middle, and bottom of the board on the ends where the supports will attach. Use 2-inch wood screws to attach the front corner supports to the front board.
Repeat this step to assemble the other side.
Step 2.2: Assemble the Front
Clamp one of the 48-inch planks to the front corner supports, again making sure that the bottom of the board is flush with the bottom of the supports. The ends of the 48-inch plank should overlap and cover the ends of the side boards. As before, drill three pilot holes on each side where this board attaches to the supports, then secure with screws.
Step 2.3: Assemble the Back
Clamp a 48-inch plank to the back corner supports. Make sure that the bottom of the board is flush with the base of the corner supports, and that each end overlaps and covers the side boards. Attach the board to the supports by drilling three pilot holes on each side and fastening with wood screws.
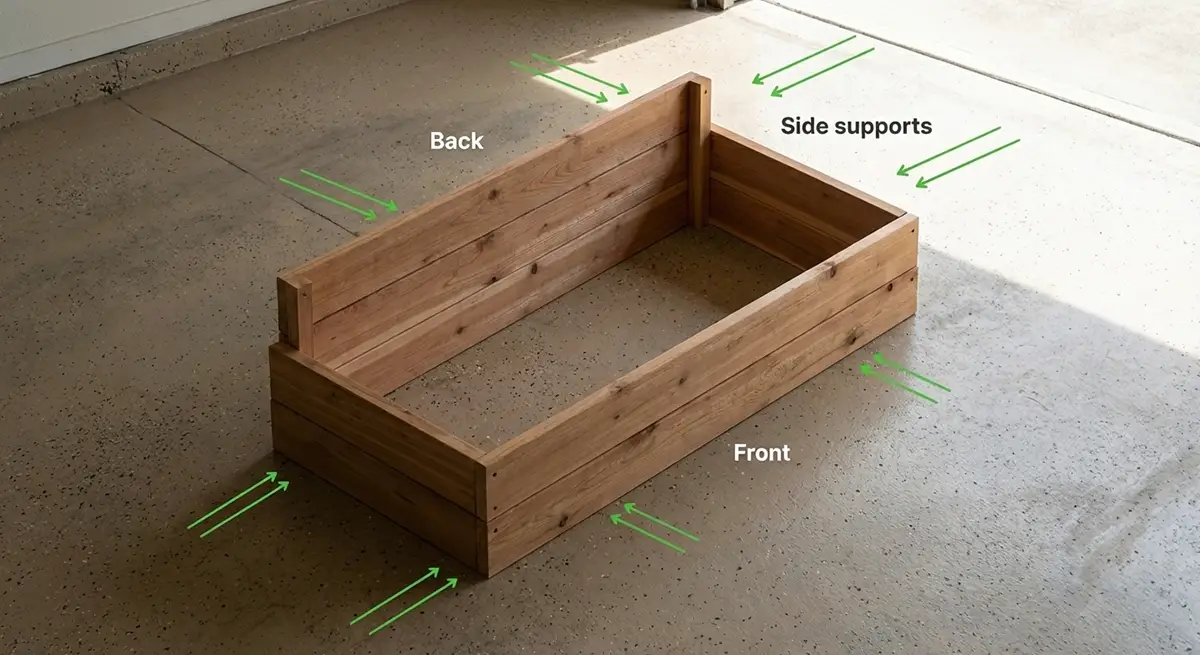
Take the remaining 48-inch plank and clamp it to the back supports so that it’s flush against the bottom 48-inch plank. Drill pilot holes and fasten as before.
Step 3: Add Sloped Sides
Now that you have the initial frame set, you can add the all-important sloped sides. You’ll start by cutting the sloped angles, then you’ll attach the angled sides to the frame base. Follow the steps below for this portion of the DIY.
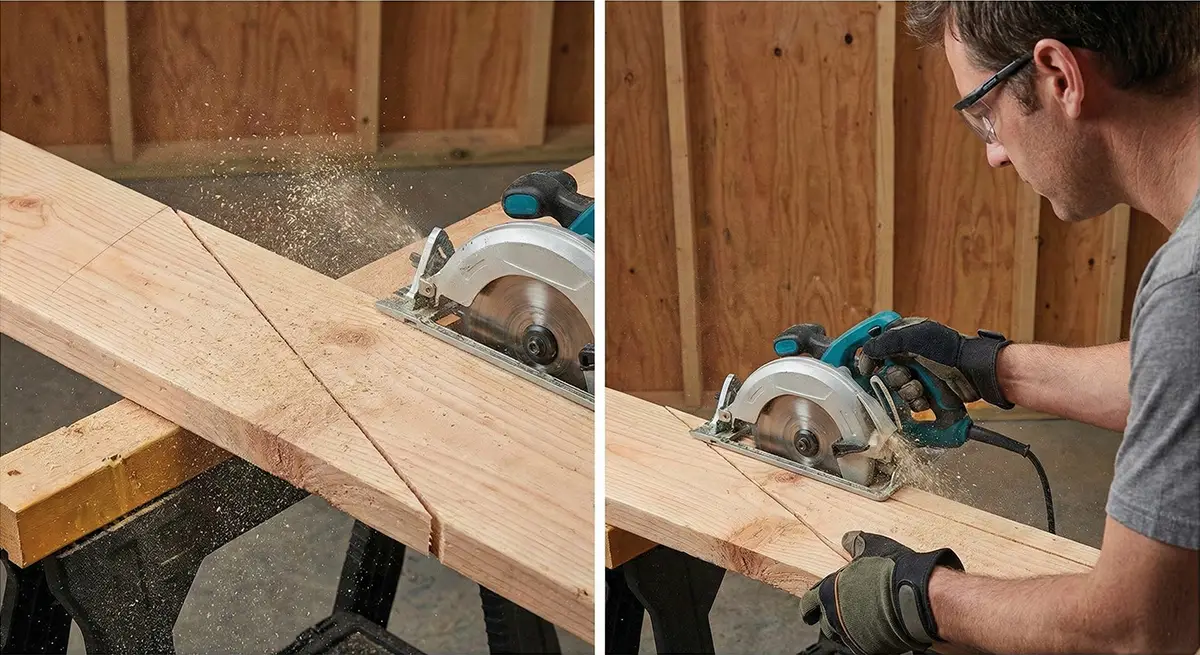
Step 3.1: Cut the Sloped Sides
Use the 23 1/4-inch pieces of 1″ x 12″ lumber to create the angled sides. On each piece, use a carpenter’s square to draw an angled line from the back top corner of the board to the bottom front corner of the board. Clamp the board securely to a sawhorse and use a circular saw to cut along the right (top) side of the line.
Step 3.2: Attach the Sloped Sides to the Frame Base
Start by clamping each sloped side piece to the back corner supports so that they’re flush against the lower side pieces. On each side, drill three pilot holes through the angled sideboard into the back corner support, and secure with wood screws.
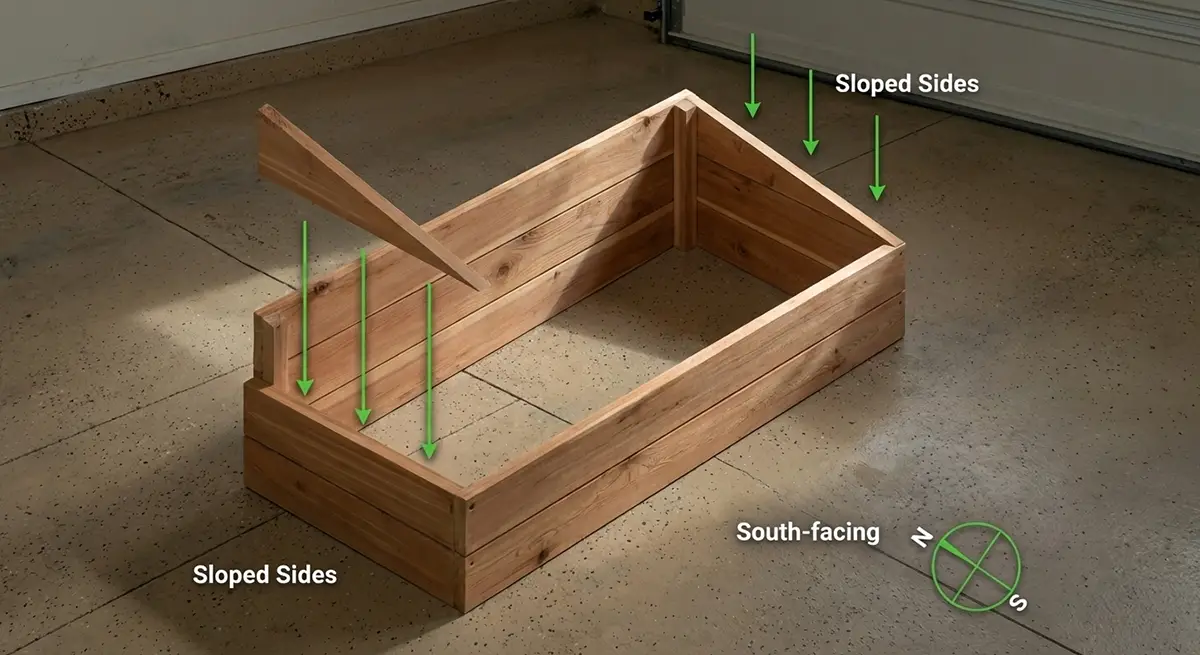
The pointed end of each sloped sideboard should overlap the top of the frontboard. Since you won’t have a corner support to attach these narrow ends, you’ll need to instead attach them by fastening each to the sideboard beneath them. Measure two to three inches from the front of the cold frame, where you’ll drill a pilot hole in each sloped board. Make sure the pilot holes drill into the bottom side boards, then use wood screws to fasten them into place.
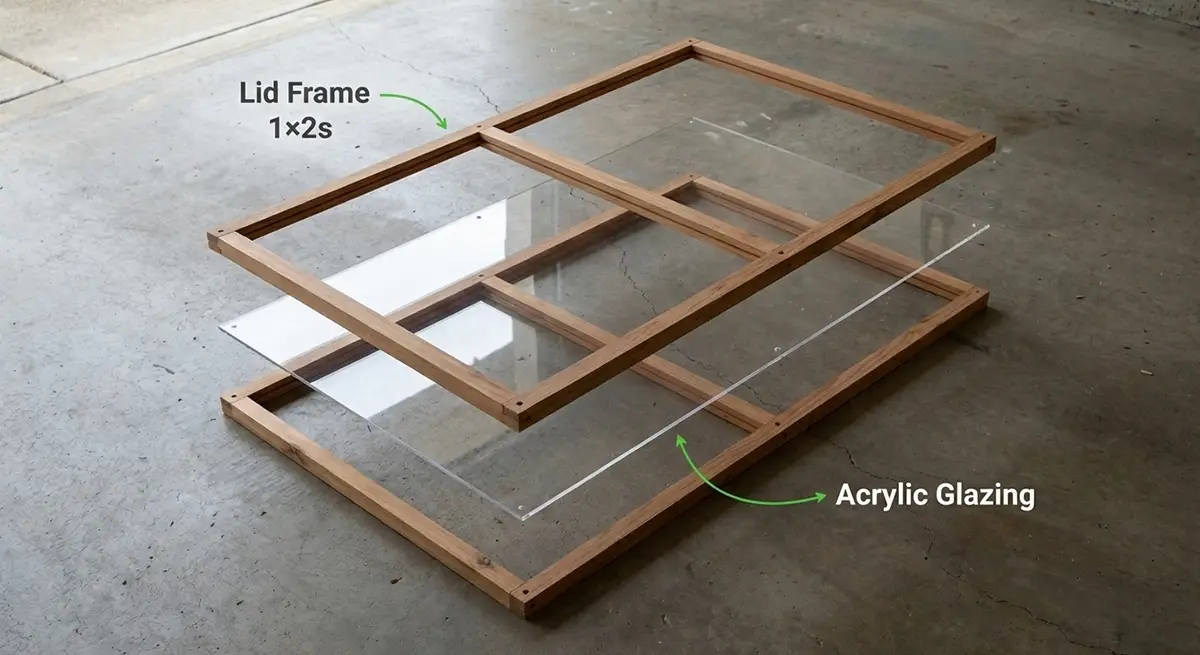
Step 4: Frame a Lid (If Not Using a Window)
If you’re creating your own cold frame lid—rather than using a window—take a look at the following cut list to figure out what you need.
Note: Because the top of the cold frame is angled, the lid will always be longer than the frame is wide. In this case, for a 2-foot-wide cold frame, the lid needs to be 26 inches wide. If you’re building a cold frame using different dimensions, be sure to measure the total length of the angled sides of the frame base to learn how wide your lid needs to be.
| Lid Frame | Cut to Length | QTY | Note |
| Cedar lumber (1″ x 2″ dimensional, 13/16″ x 1 1/2″ actual) | 48″ | 4 | Front and back of frame |
| Cedar lumber (1″ x 2″ dimensional, 13/16″ x 1 1/2″ actual) | 24 3/8″ | 6 | Sides and center of frame |
Step 4.1: Attach Top Frame Pieces to the Glazing
Take two of the 48″ frame pieces and clamp them into place along one edge of your glazing material so that the glazing is sandwiched between them. Drill pilot holes at the ends of the lumber every six inches, then use pan head screws to fasten the lumber and glazing together.
Step 4.2: Attach Sides and Center of Frame
Attach two short frame pieces in the center of the glazing material. The ends of these will fit flush against the top and bottom frame pieces. Drill pilot holes and fasten with screws at the ends of the wood and every six inches.
Repeat this step to fasten the sides of the frame along the short edges of the glazing material.
Step 4.3: Attach Bottom Frame Pieces to Glazing
Repeat step 4.1 to attach the last two 48″ pieces of lumber to the lid. Once completed, these pieces should be flush against the ends of the side and center frame pieces, with your glazing material sandwiched between two layers of lumber.
Optional: Using a Salvaged Window
If you’re using a salvaged window, then skip the steps above. Instead, use 80 to 120-grit sandpaper to roughen the existing finish or remove splinters and paint chips, then repaint the window frame to help seal it against moisture.
Step 5: Attach the Lid with Hinges
Now you’re on to the finishing touches, from attaching the lid to adding an automatic vent if you want one.
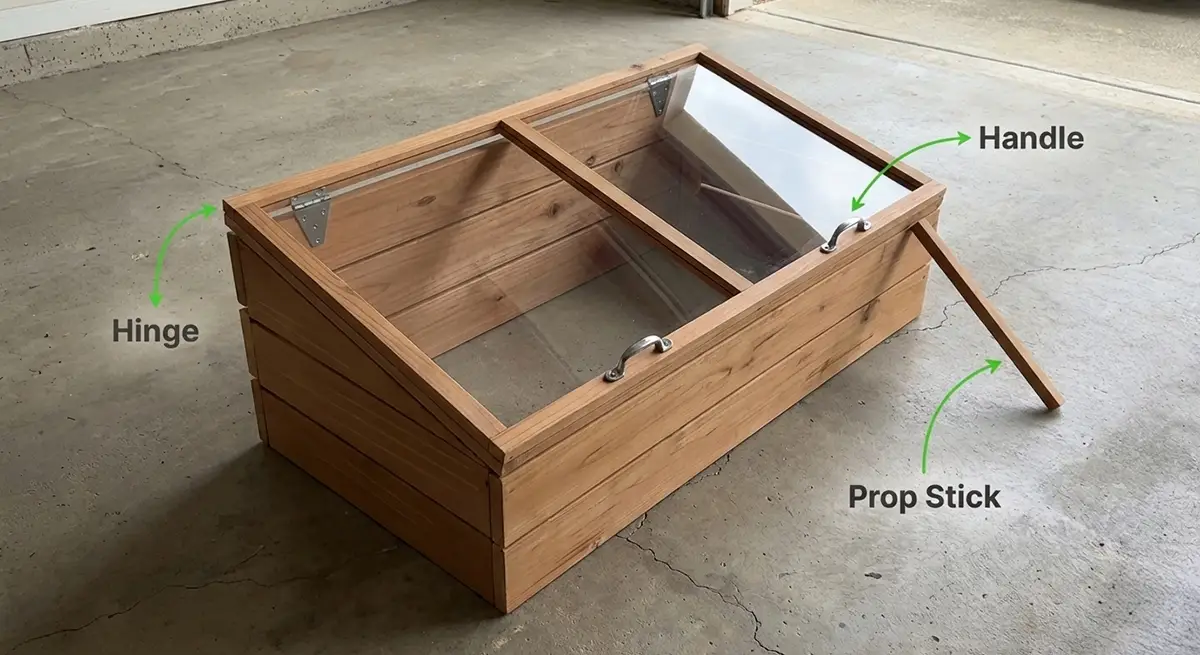
Step 5.1: Attaching the Hinges
Position the lid on the cold frame so that the front and sides align. Position the hinges along the back edge of the lid, ensuring that you can fold them flat to reach the fold frame base. Once you’ve placed the hinges, use the screws that came with them to secure them in place.
Step 5.2: Attaching the Handle
Attach the handle to the top of the lid’s front frame piece, making sure that it is centered. Use pan head wood screws to secure it.
Step 5.3: Create a Lid Prop or Install an Automatic Vent
As the growing season warms up, you’ll need to be able to prop the lid open. You can either use a lid prop or an automatic vent.
Lid prop: Just take leftover pieces of your 1″ x 2″ lumber and cut two 2-foot pieces, which you can then use to prop up the lid in the front corners.
Automatic vents: These are mechanical arms that can open and close your cold frame lid automatically whenever the temperature reaches a certain point. They can be a little more difficult to install (Follow the provided manufacturer instructions for the model that you select), but they’ll ensure that the plants inside the frame never get too hot or too cold.
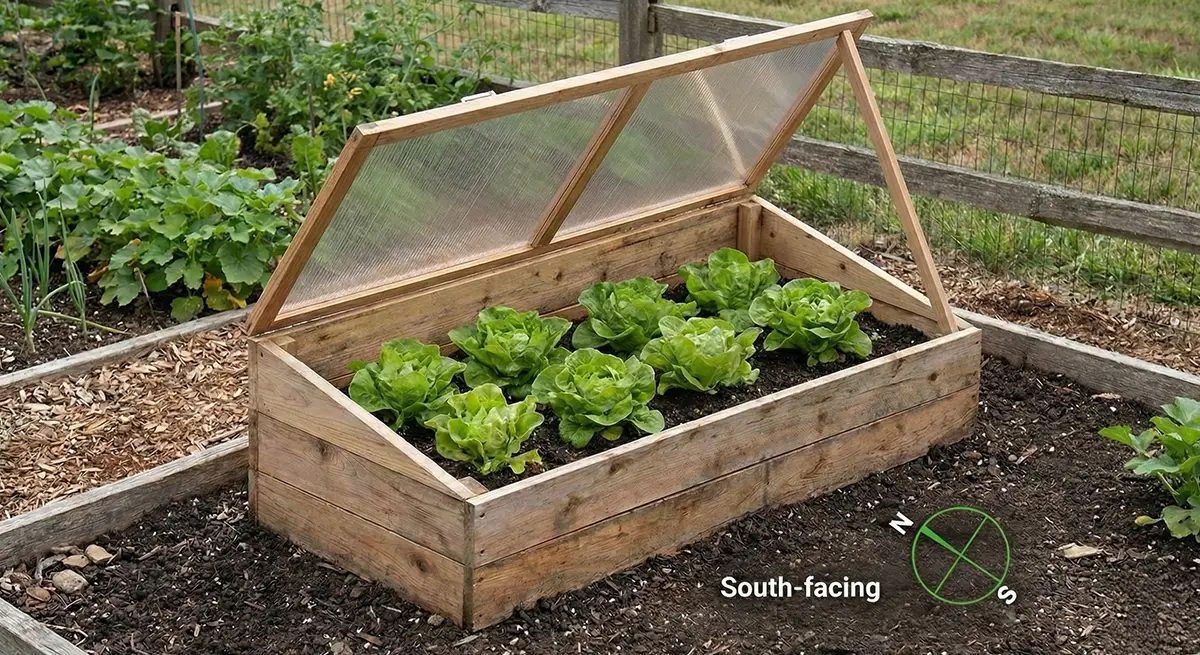
Step 6: Set It Up in Your Garden
Congrats! You’ve made a DIY cold frame that you can use in a raised bed or in-ground garden. Choose a sunny, south-facing location and either place it on the walls of a raised bed, or directly onto soil or mulch.
For cold frames that will be sitting directly on the ground, it’s best to dig small trenches in a rectangle that matches the dimensions of the frame. Three to four inches is usually plenty. This will ensure the frame sits level without rocking. You’ll then fill the trenches back in, which helps seal up any gaps along the bottom of the frame, giving it a touch more insulation.
Tips for Maintaining Your Cold Frame
Once you have your cold frame set up, you can rely on these tips for maintaining it year-round and ensuring your plants and crops stay healthy.
- Prevent leaks. Add weatherstripping between the lid and the top of the frame and caulk seams between boards to create better insulation.
- Seal the wood. Use a coat of weatherproof paint or sealant to prevent rotting.
- Keep an eye out for pest damage. Inspect your frame for holes, chewing, or tunneling beneath it.
- Check your fasteners and glazing. Do so seasonally or at least yearly and replace hazy glazing or broken fasteners.
- Clean your frame. At the beginning of the growing season, use a mild bleach solution to clean and disinfect.
- Balance the temp. Use a lid prop to keep temperatures just right in your cold frame.
- Stay on top of cracked glazing. Replace it if it’s broken; otherwise, your cold frame can lose its temperature regulation capabilities.
- Check for mold or mildew. These can point to too much moisture. For half-buried frames, consider setting them on top of the soil. For those already on the surface, add a quart of gravel, sand, or perlite to every cubic foot of soil for better drainage.
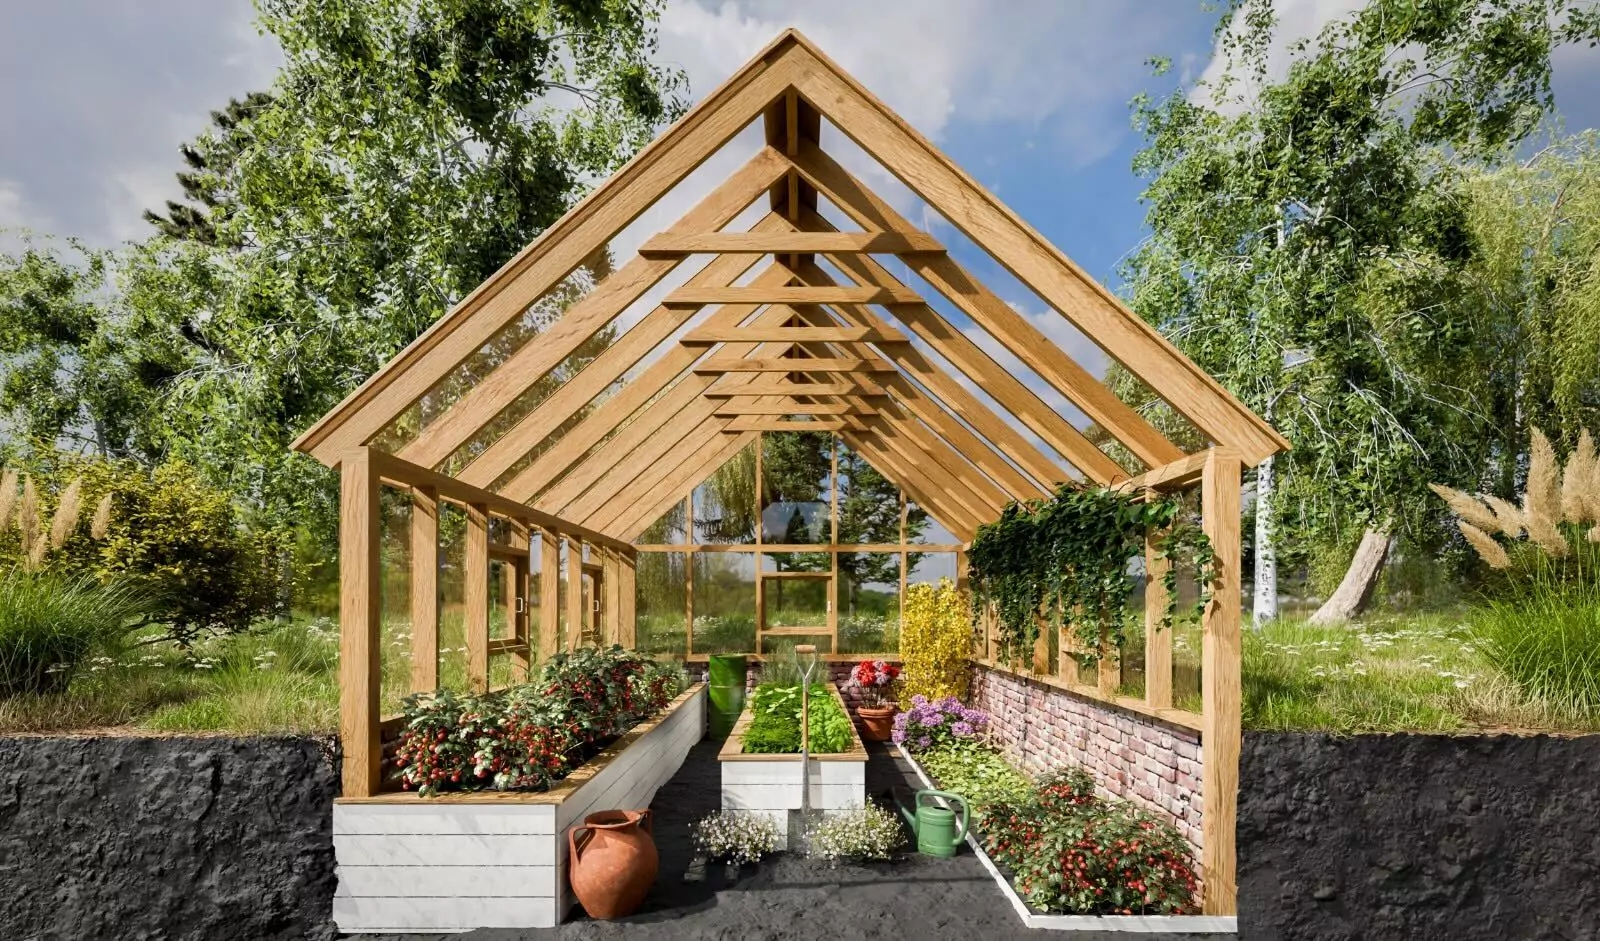
Final Thoughts: Start Small, Grow More
Building an affordable DIY cold frame is possible for any gardener with a little ambition. It saves you money in the long run compared to pre-made kits, and it’s a great step between going from raised or in-ground beds to a full-size greenhouse. Before you know it, you’ll have a great tool for protecting crops from cold snaps, and many more long-lasting harvests of fruits, veggies, and herbs.